
How to Send an Invoice (Mobile App)


This guide walks you through how to send an invoice (mobile app) in PoolDial, step by step.
This guide covers 6 steps and takes about a minute to complete.
Video Walkthrough
Prefer to watch? Here's a full video walkthrough of How to Send an Invoice (Mobile App).
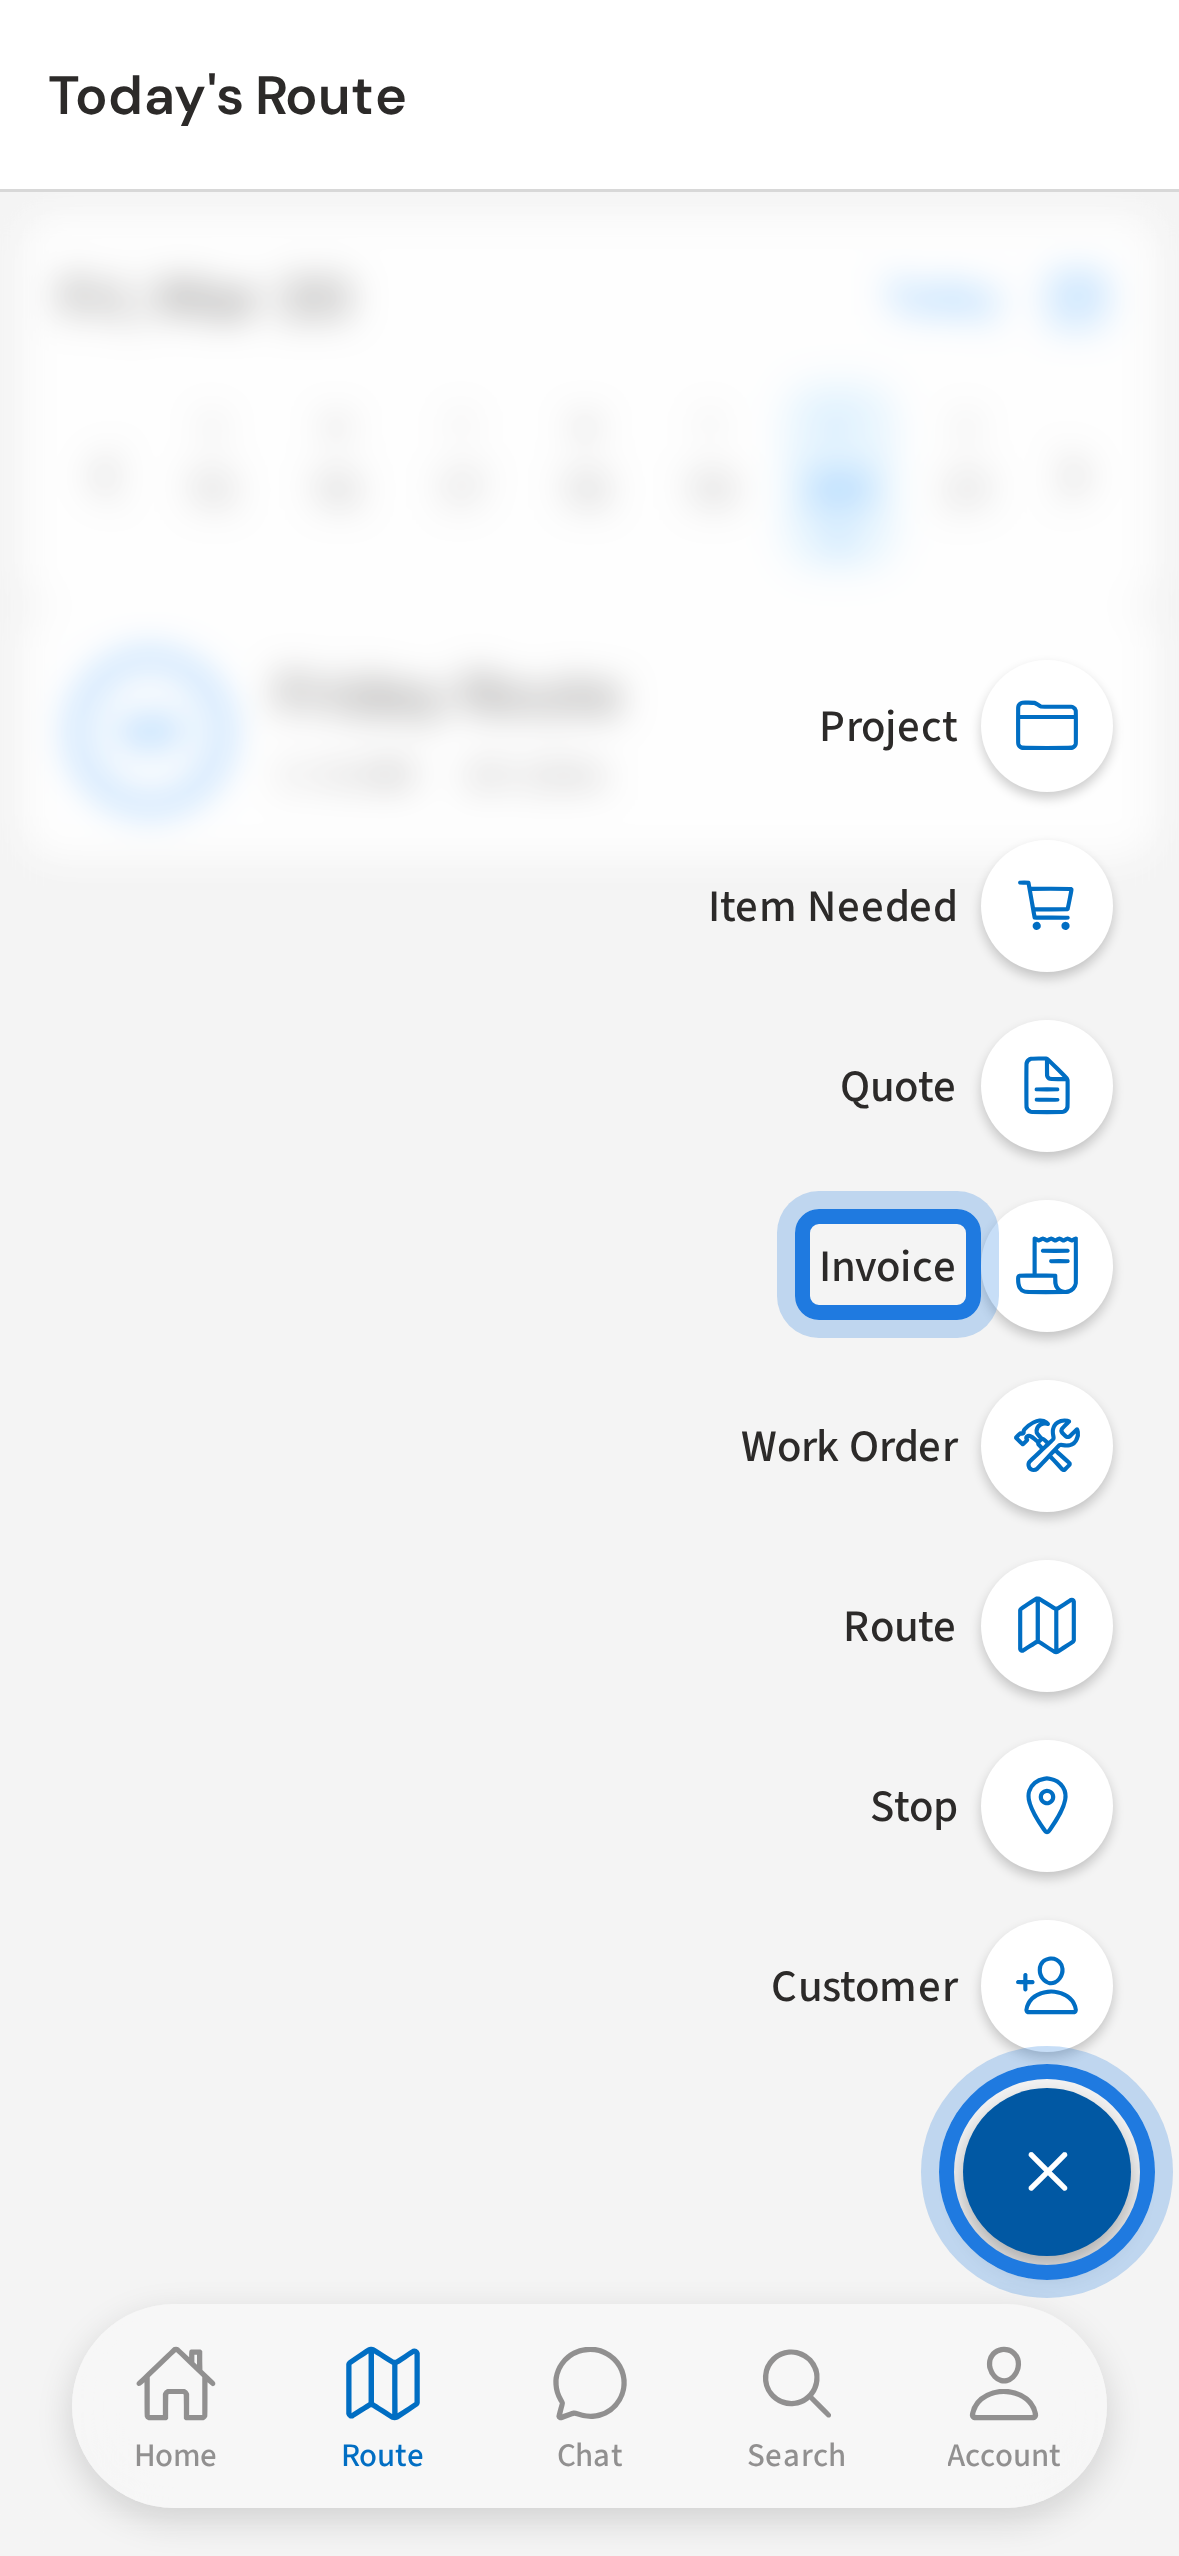
1. Tap + then Invoice to open the invoice form
Tap the + floating button and select Invoice to open the invoice form.
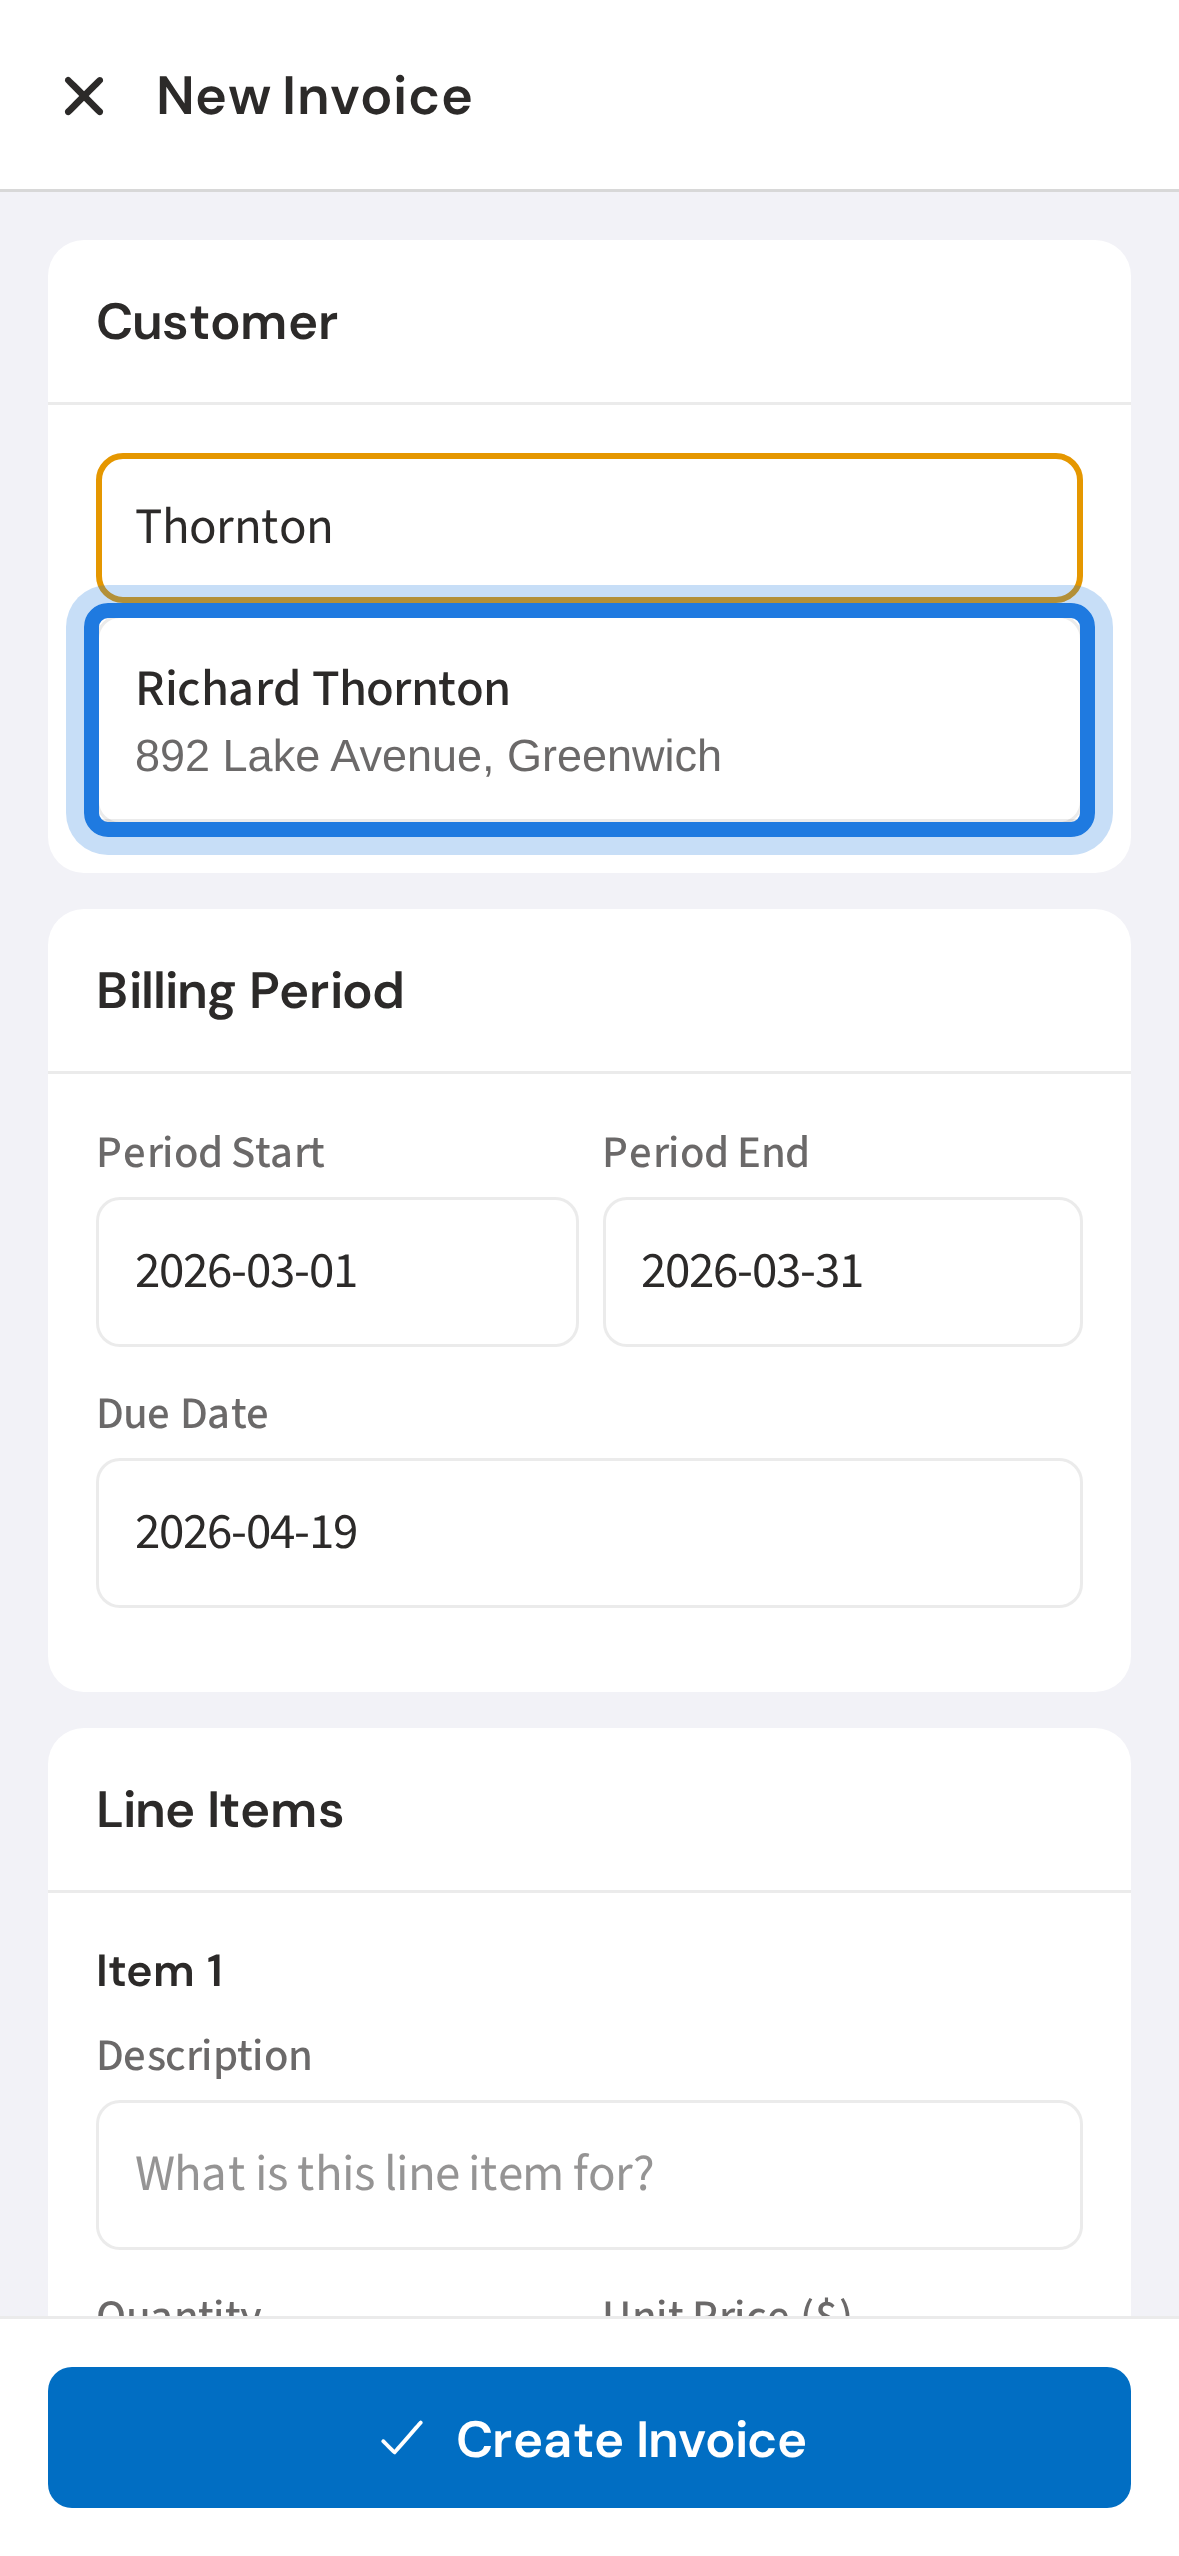
2. Search for a customer and tap to select
Search for the customer by name and tap their row to link the invoice to their account.
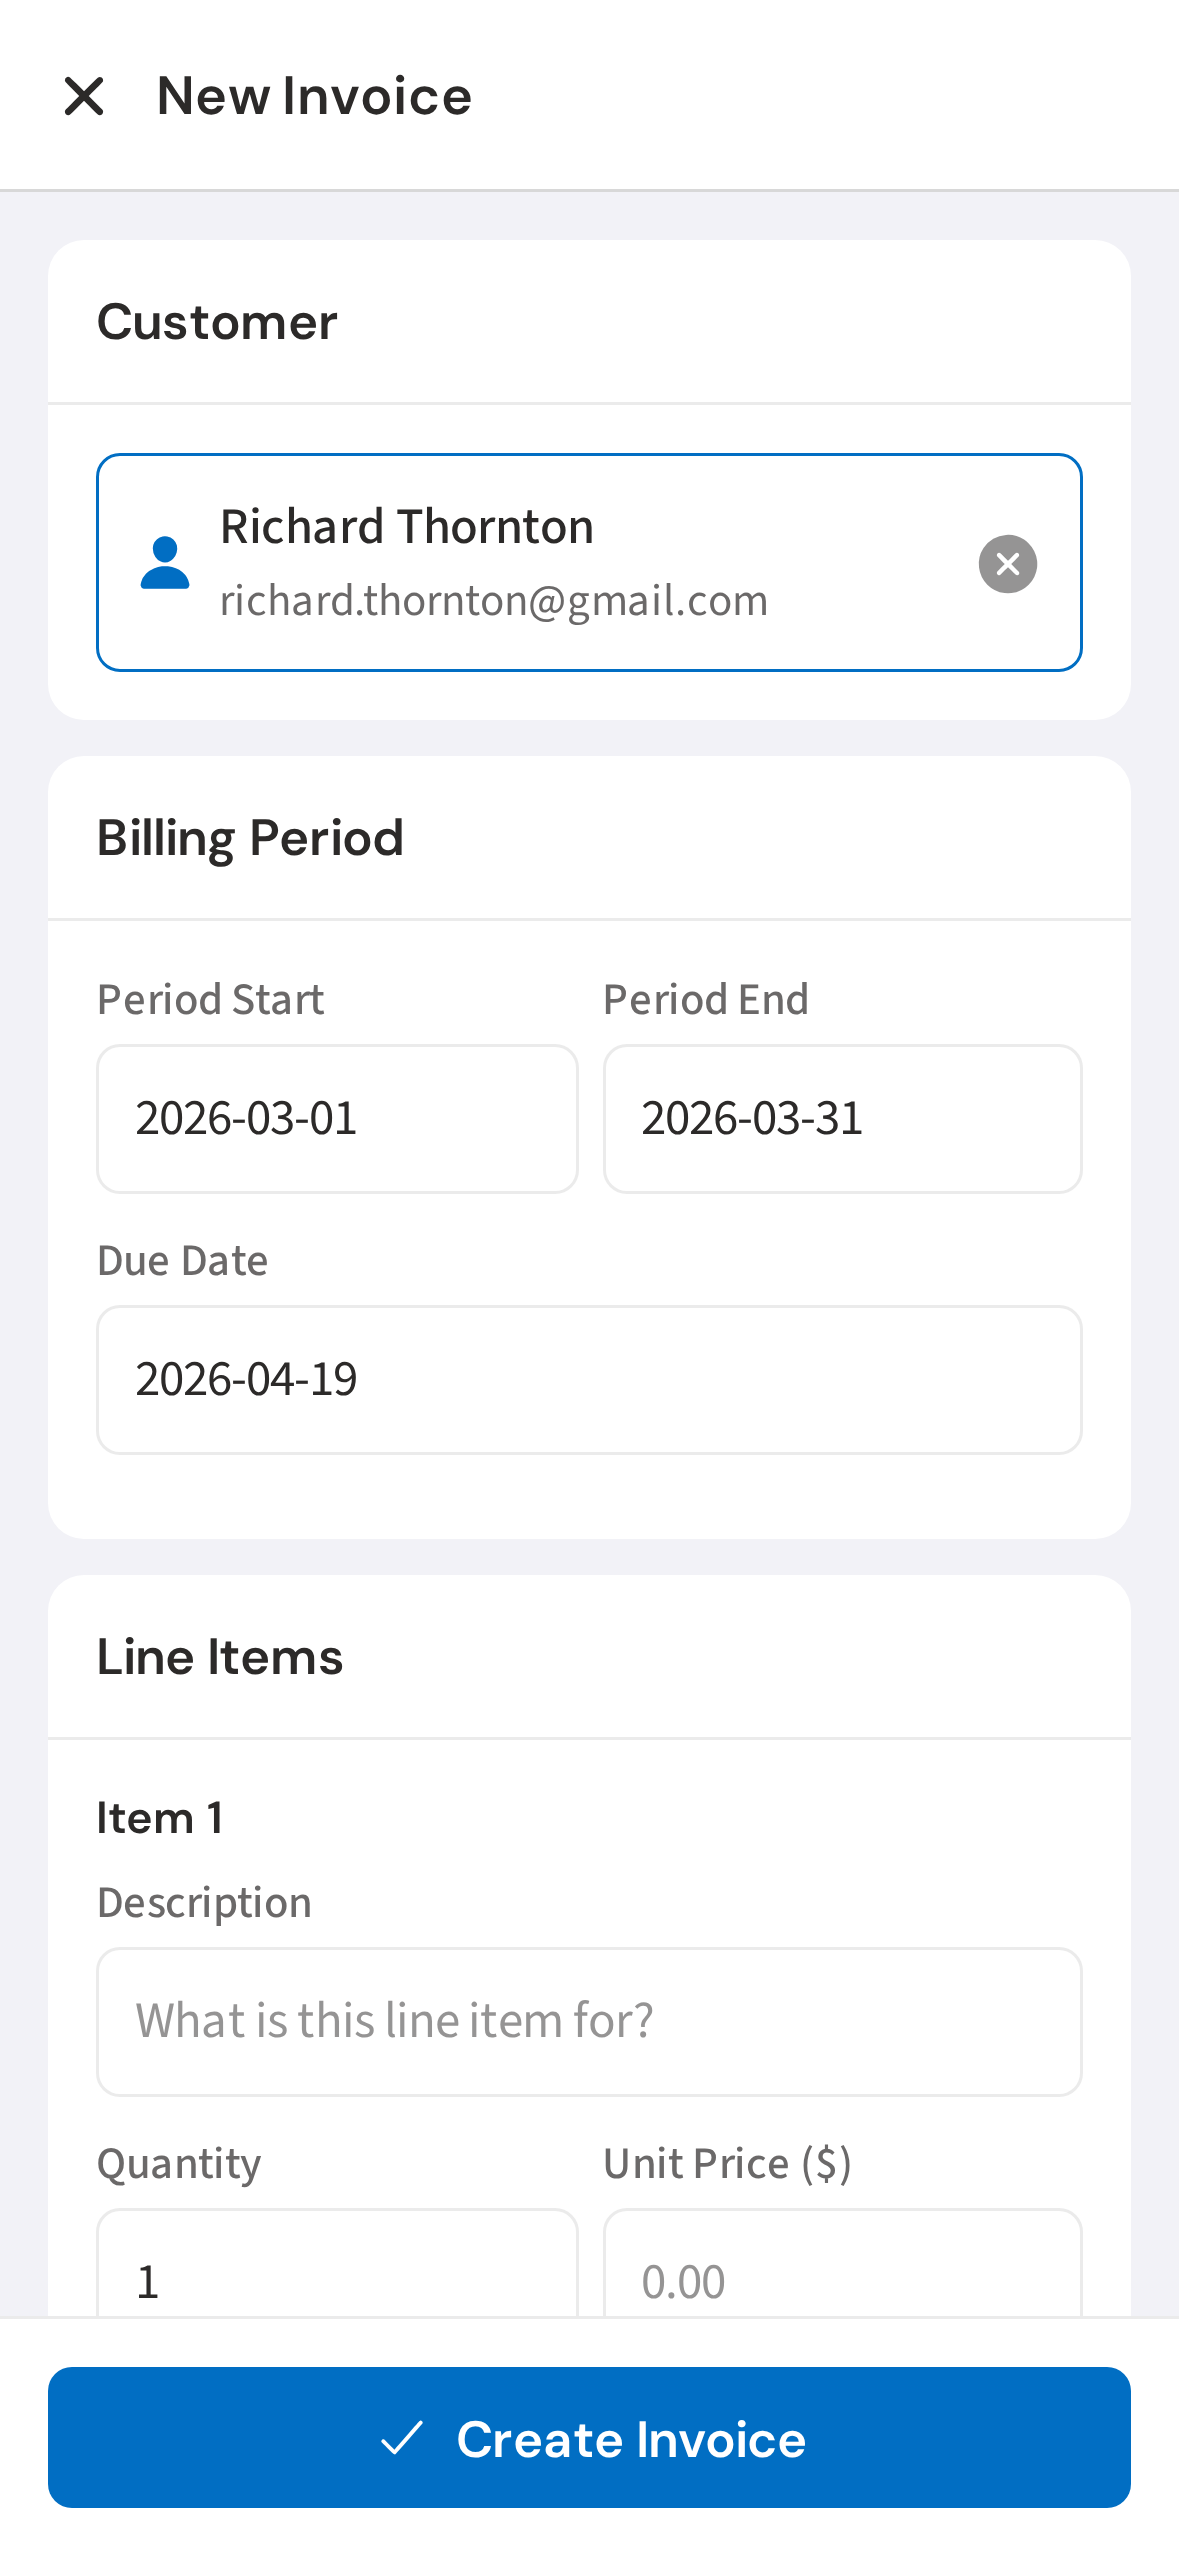
3. Billing period and due date pre-filled for the current month
The billing period and due date are pre-filled for the current month. Adjust them if needed.
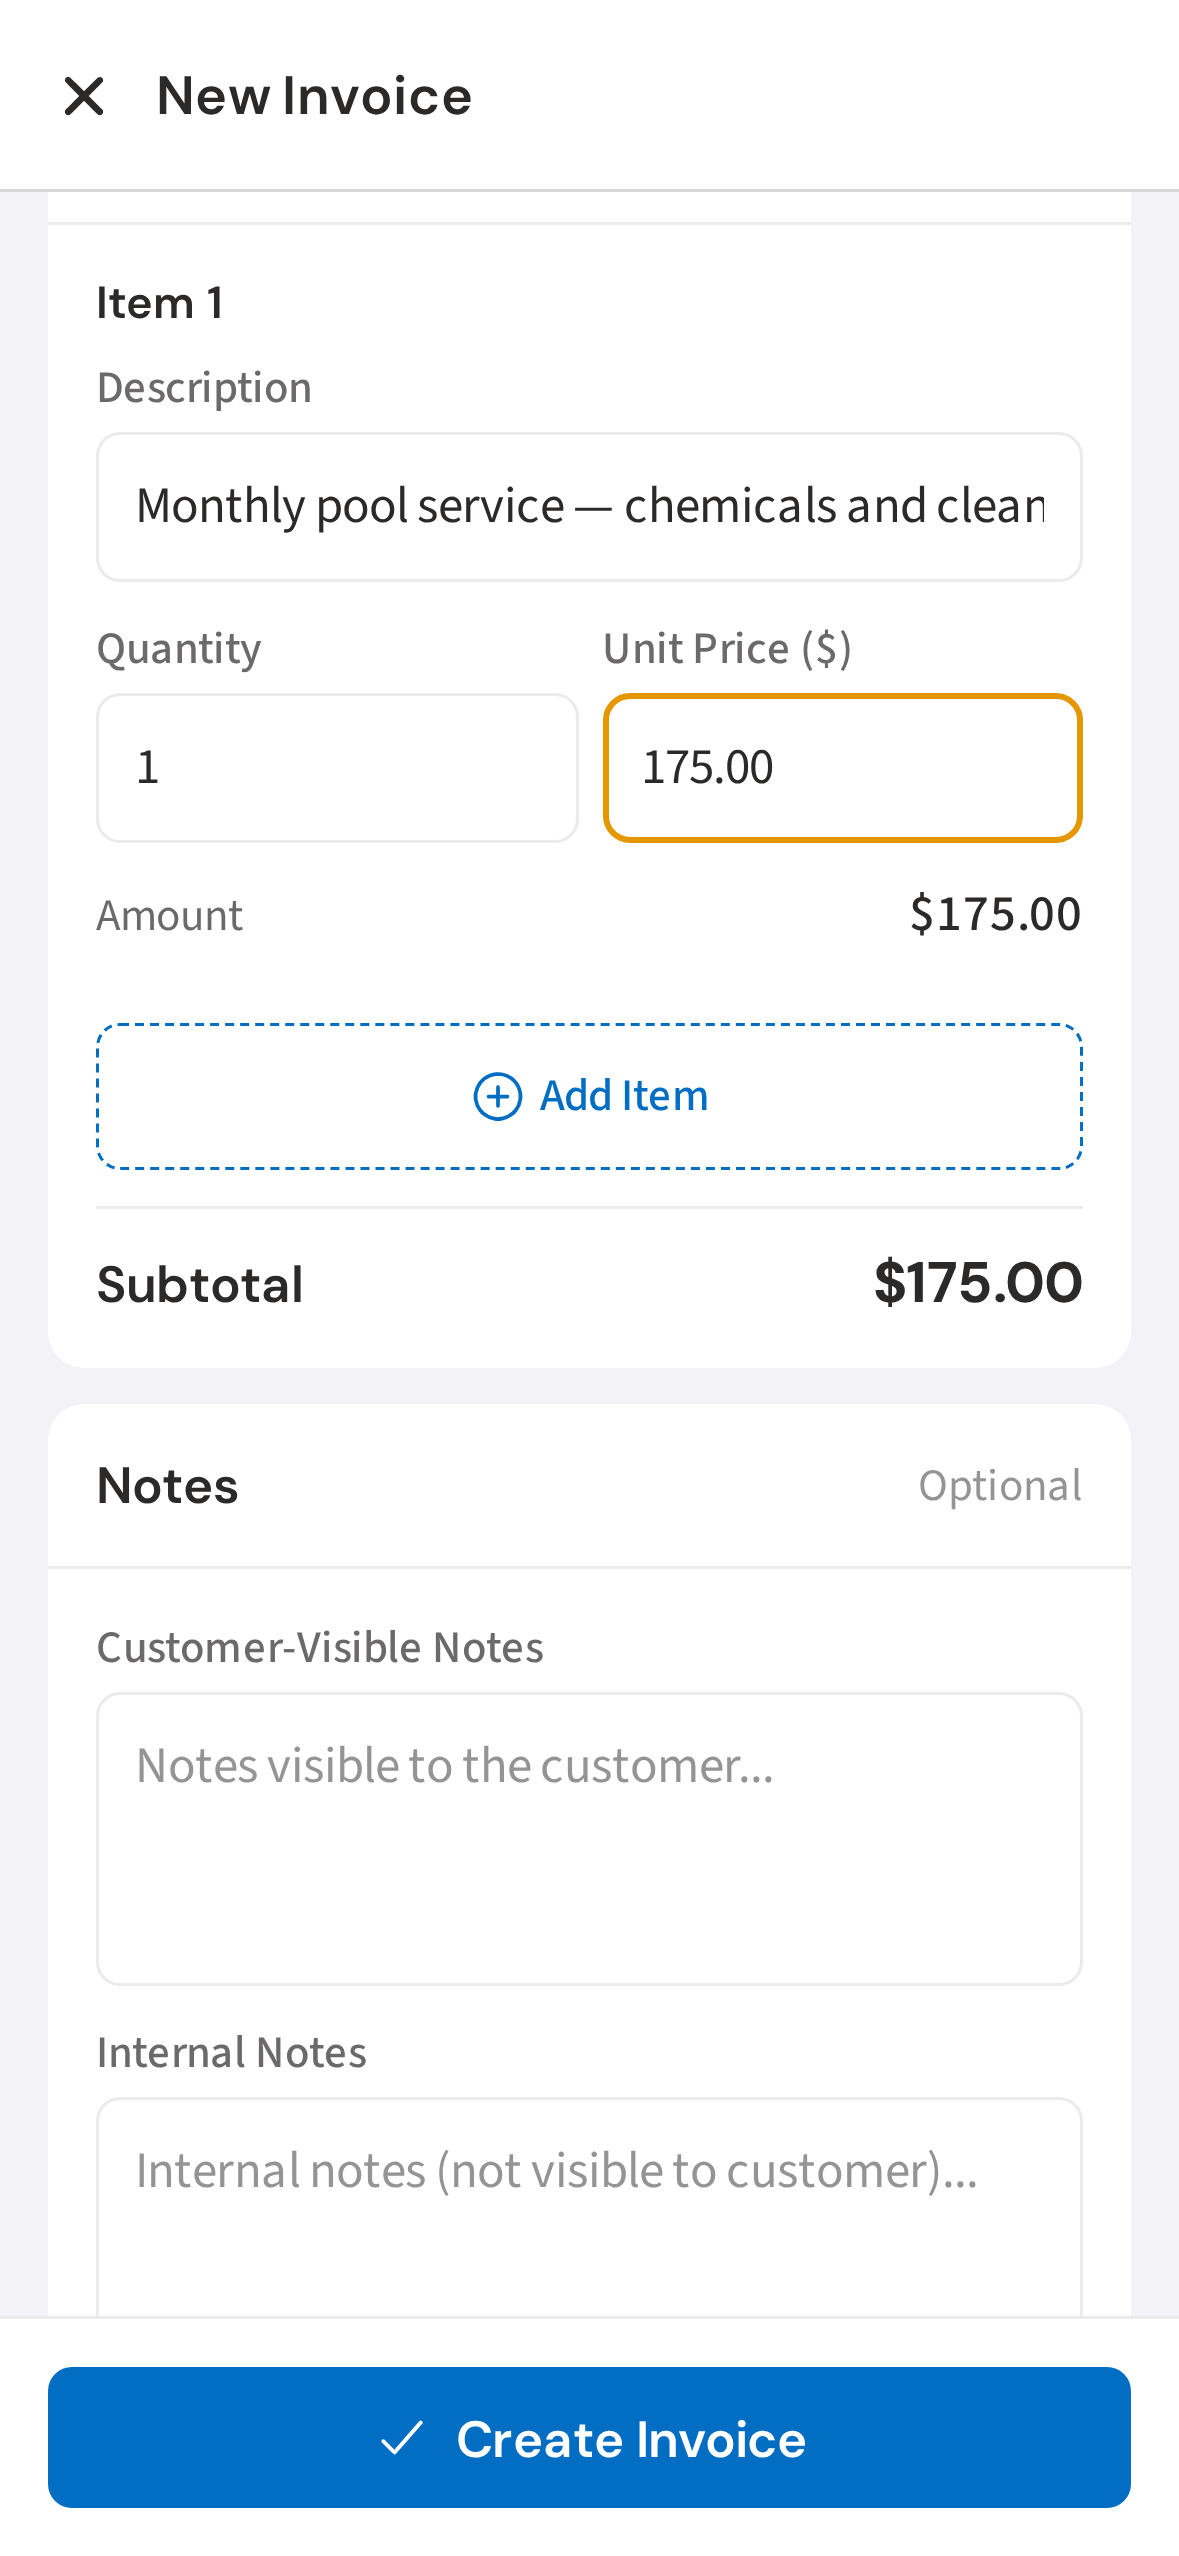
4. Add a line item with description and price
Add a line item with a description and price. Tap Add Item to include more. PoolDial shows a running subtotal.
5. Add notes and toggle Send Immediately
Add any customer-visible notes, then toggle Send Immediately to email the invoice as soon as you save.
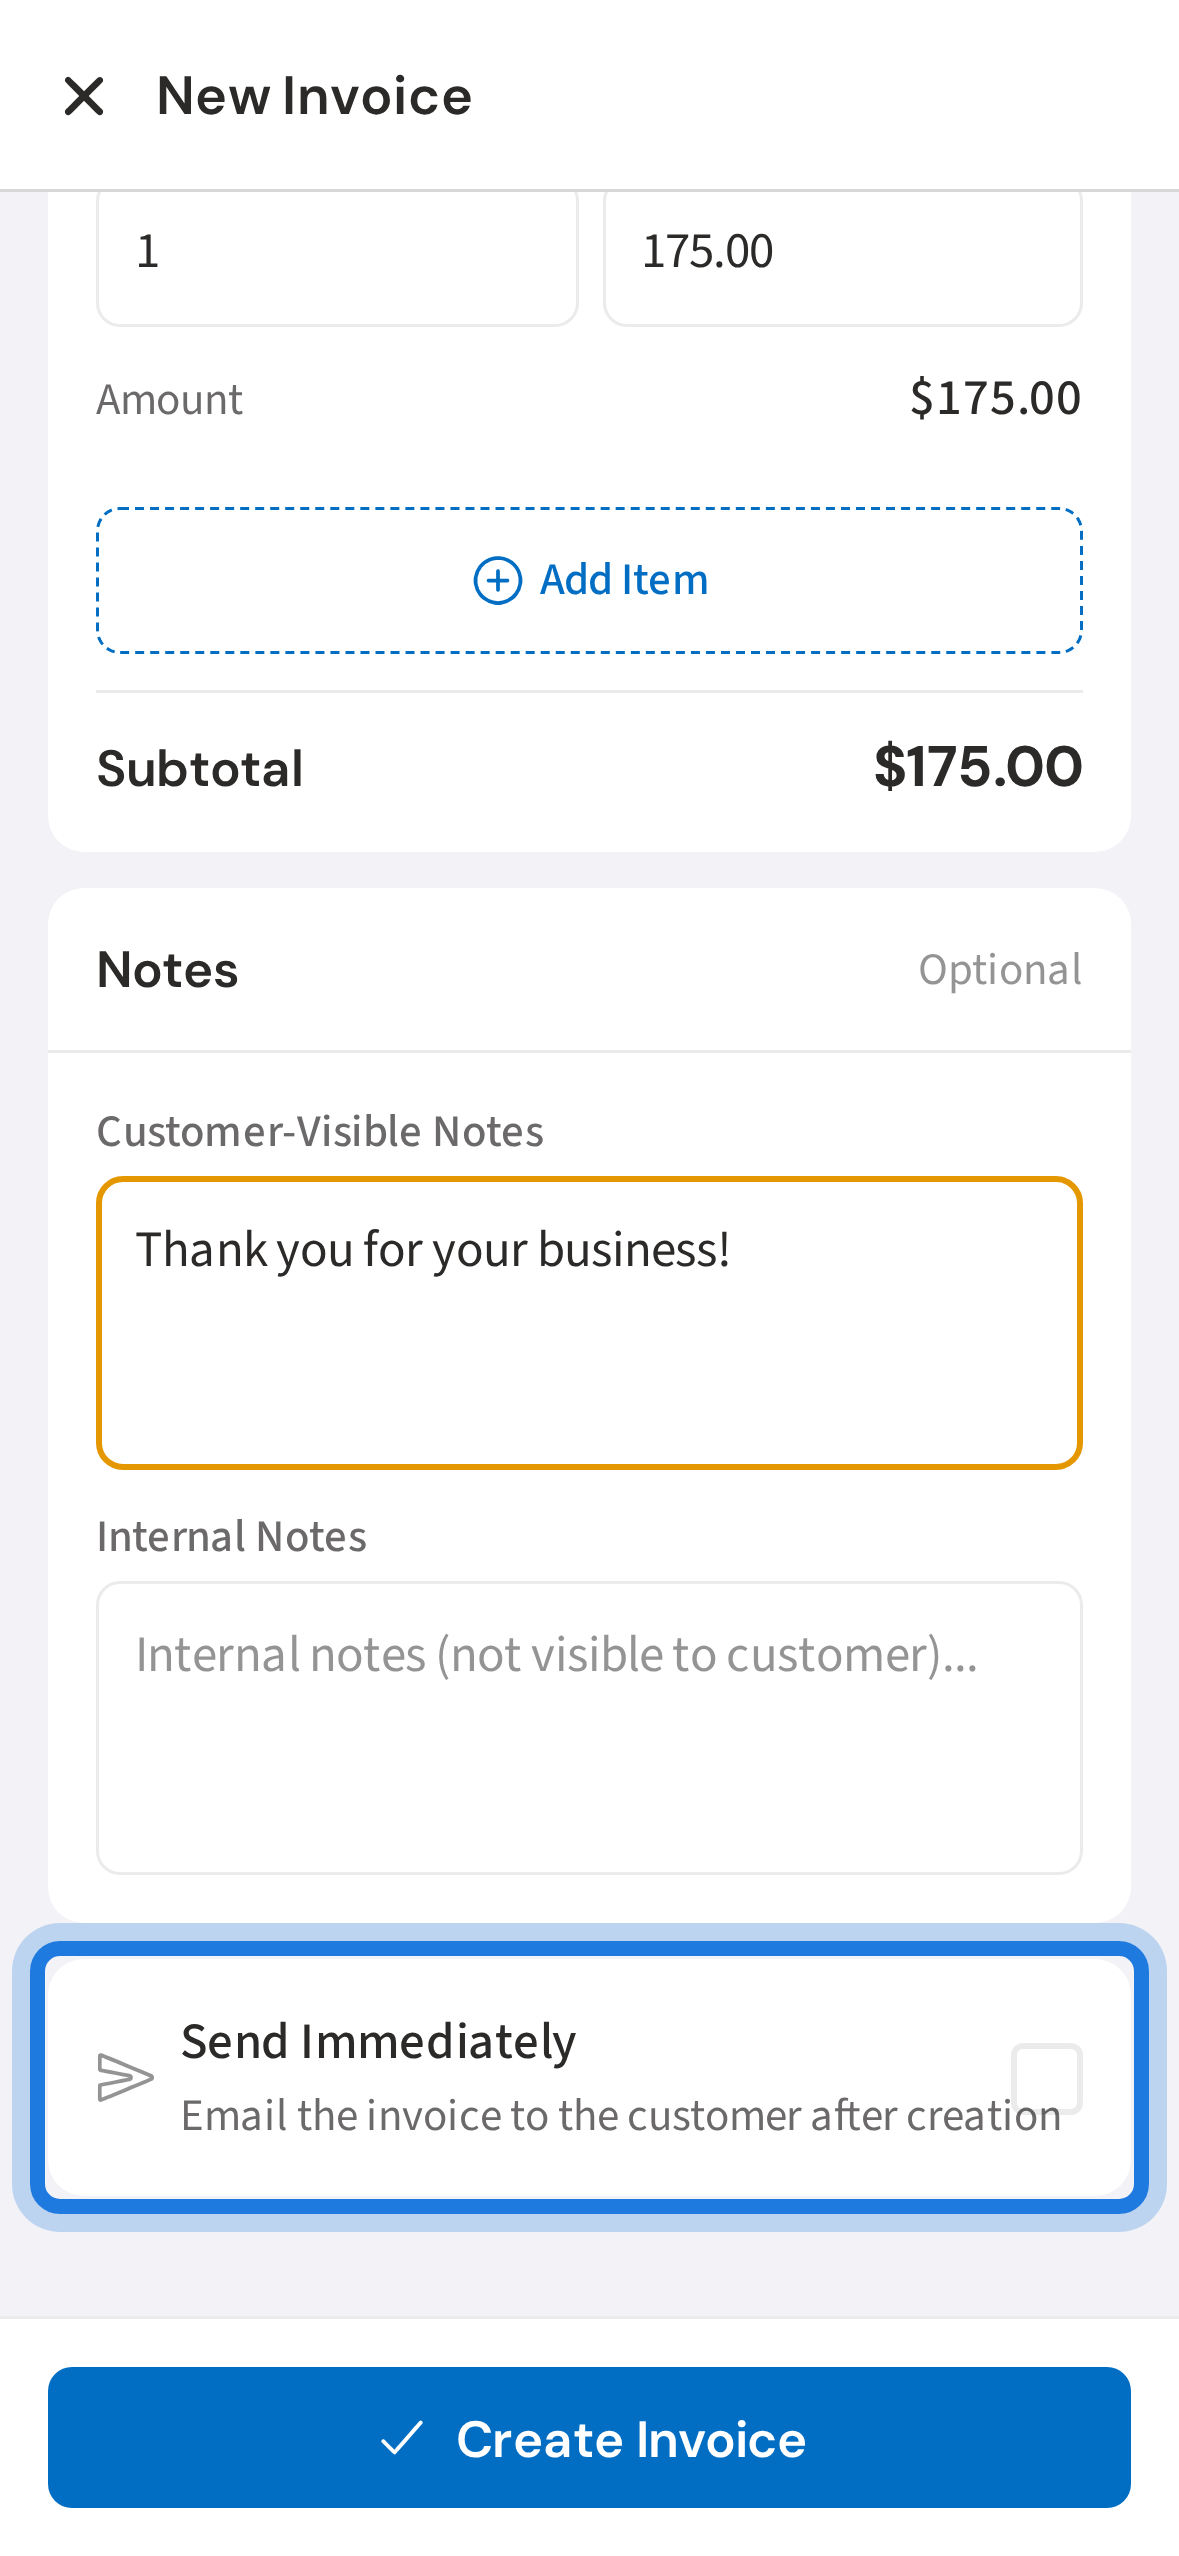
6. Tap Create Invoice to save and send
Tap Create Invoice. PoolDial saves the invoice and, if you toggled Send Immediately, emails it directly to the customer.
Not using PoolDial yet?
Manage your customers, routes, billing, and more — all in one place.
Start Free Trial