
How to Enable GPS Tracking

This guide walks you through how to enable gps tracking in PoolDial, step by step.
This guide covers 5 steps and takes about a minute to complete.
Video Walkthrough
Prefer to watch? Here's a full video walkthrough of How to Enable GPS Tracking.
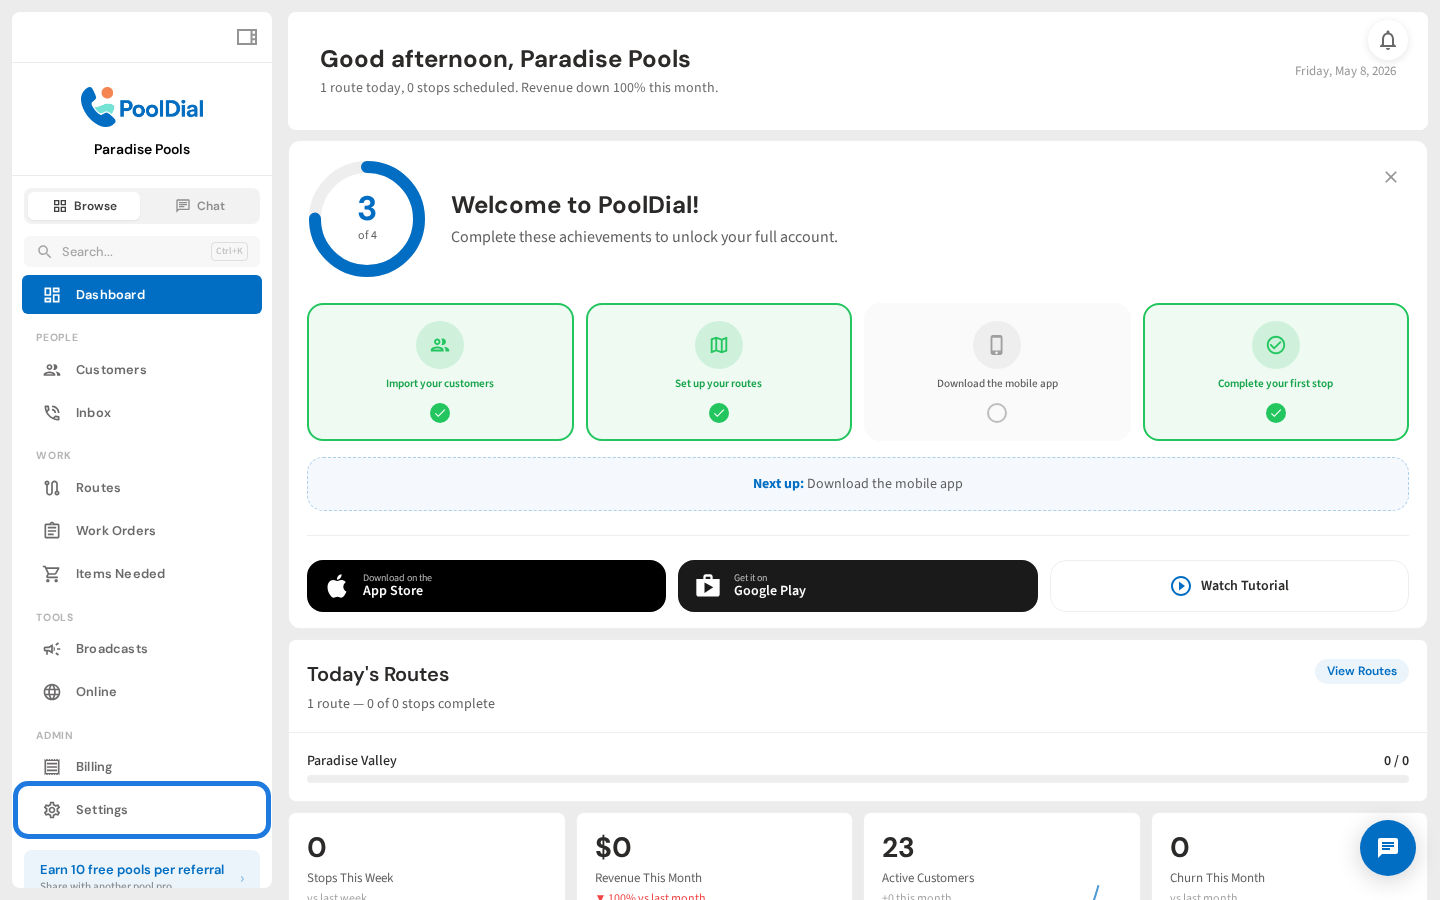
1. Open Settings
From the left sidebar, click Settings to open the settings page.
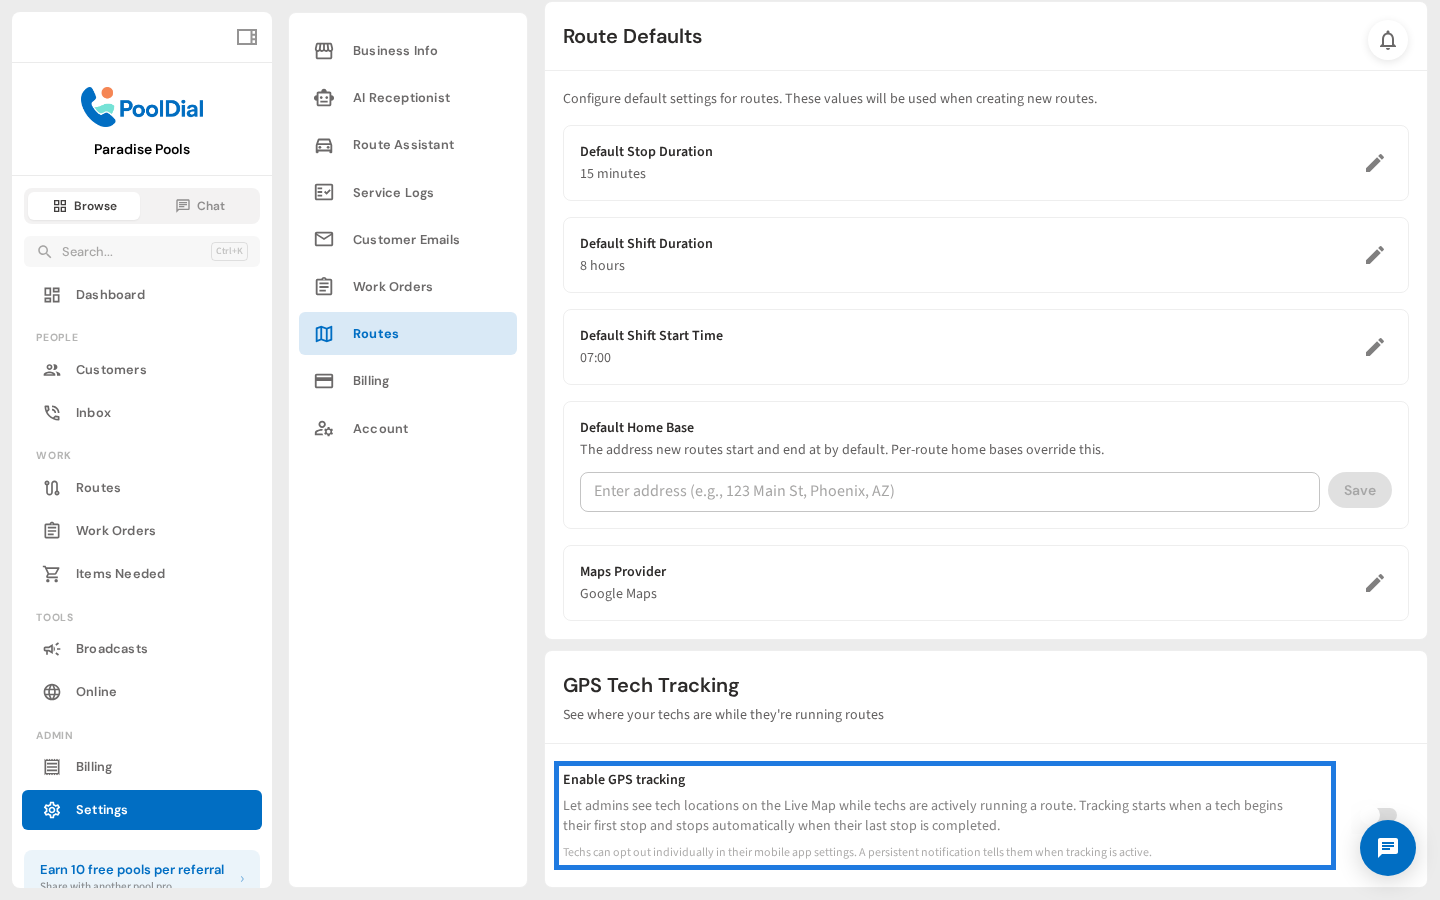
2. Click Routes in settings
In the settings sidebar, click Routes to open Route Defaults.
3. Toggle Enable GPS tracking
Scroll down to the GPS Tracking section. Toggle Enable GPS tracking to turn it on for your account.
4. History Retention setting appears
Once enabled, a History Retention option appears. This controls how many days of location history are stored. The default is 90 days.
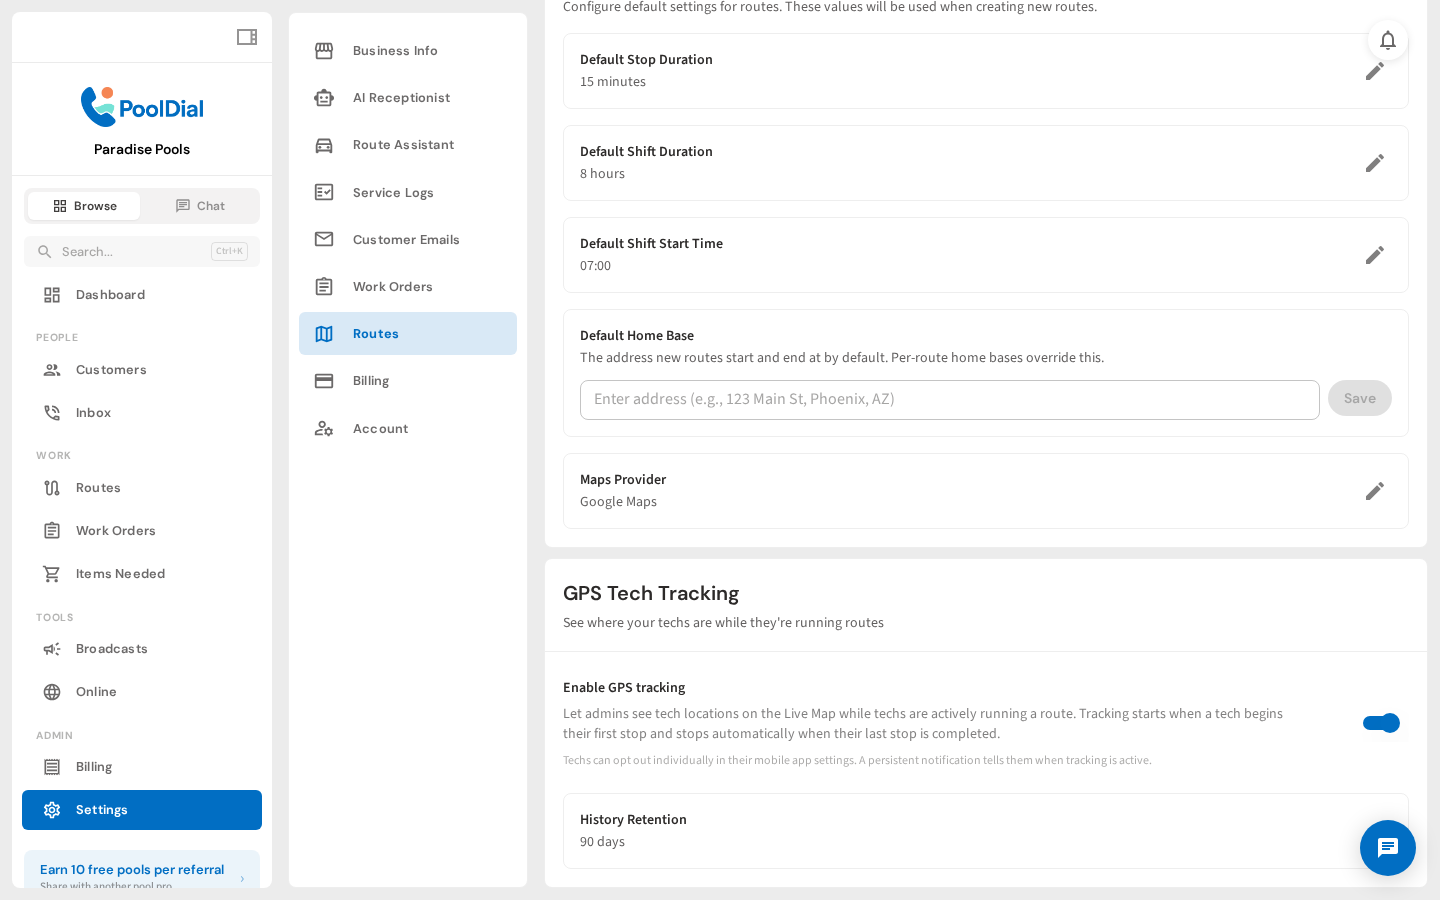
5. GPS tracking is enabled
GPS tracking is now active. Technicians will be tracked automatically when they start running a route. They can opt out individually in the mobile app.

Not using PoolDial yet?
Manage your customers, routes, billing, and more — all in one place.
Start Free Trial