
How to Add a Pool (Mobile)

This guide walks you through how to add a pool (mobile) in PoolDial, step by step.
This guide covers 8 steps and takes about a minute to complete.
Video Walkthrough
Prefer to watch? Here's a full video walkthrough of How to Add a Pool (Mobile).
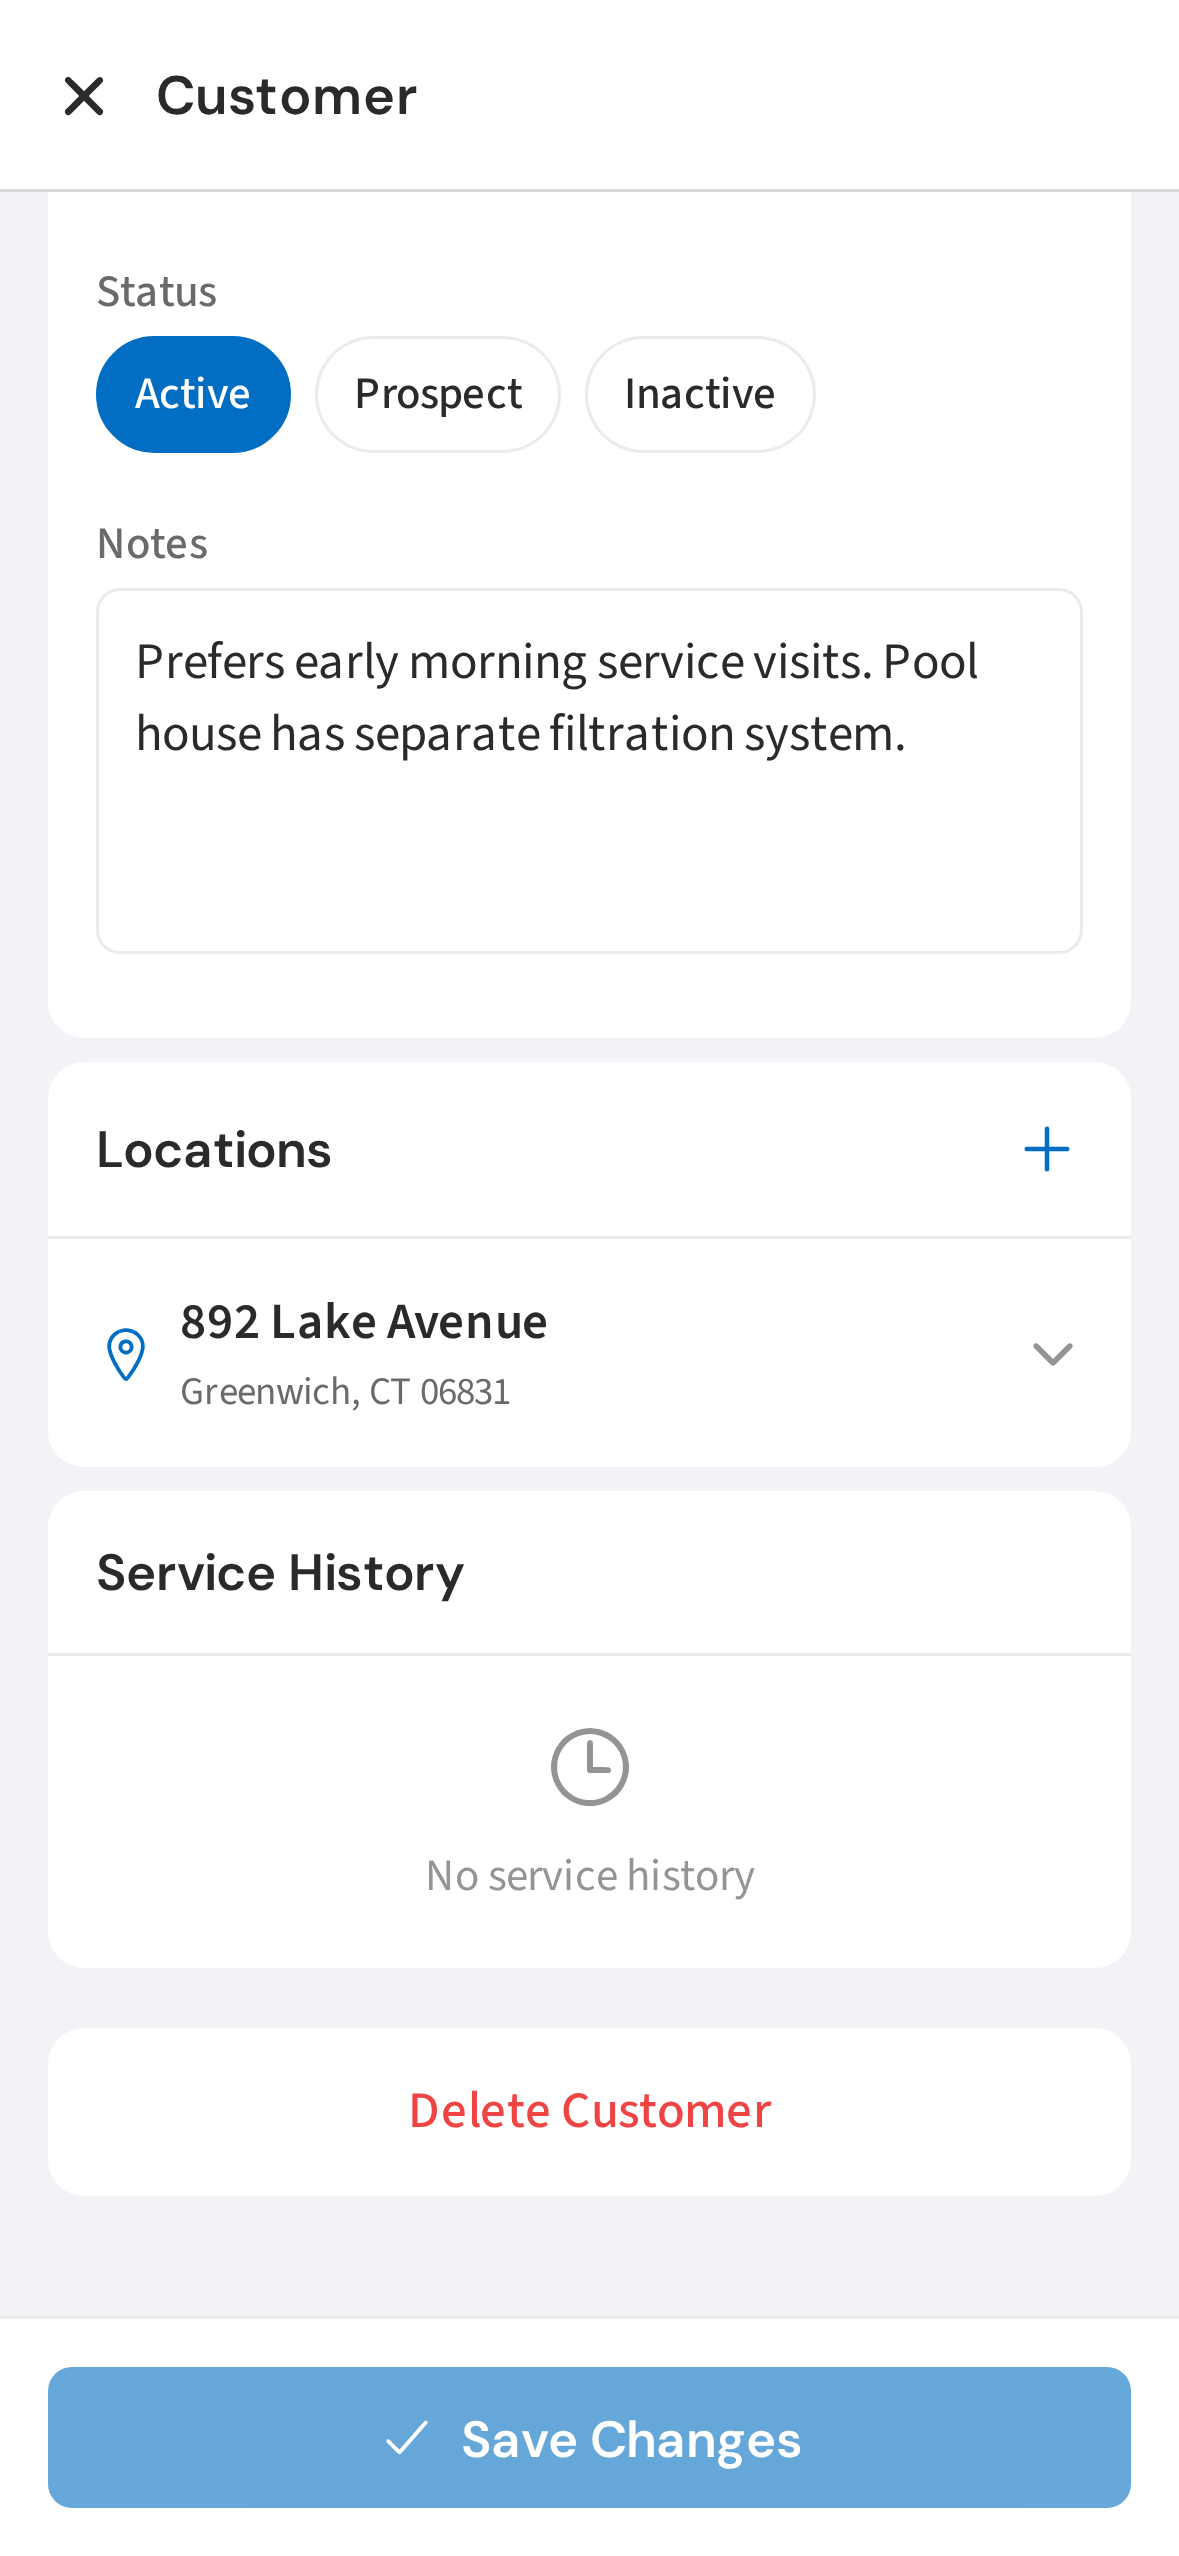
1. Customer profile — Locations section
Open a customer's profile by searching for them or tapping them from a route stop. Scroll down to the Locations card.
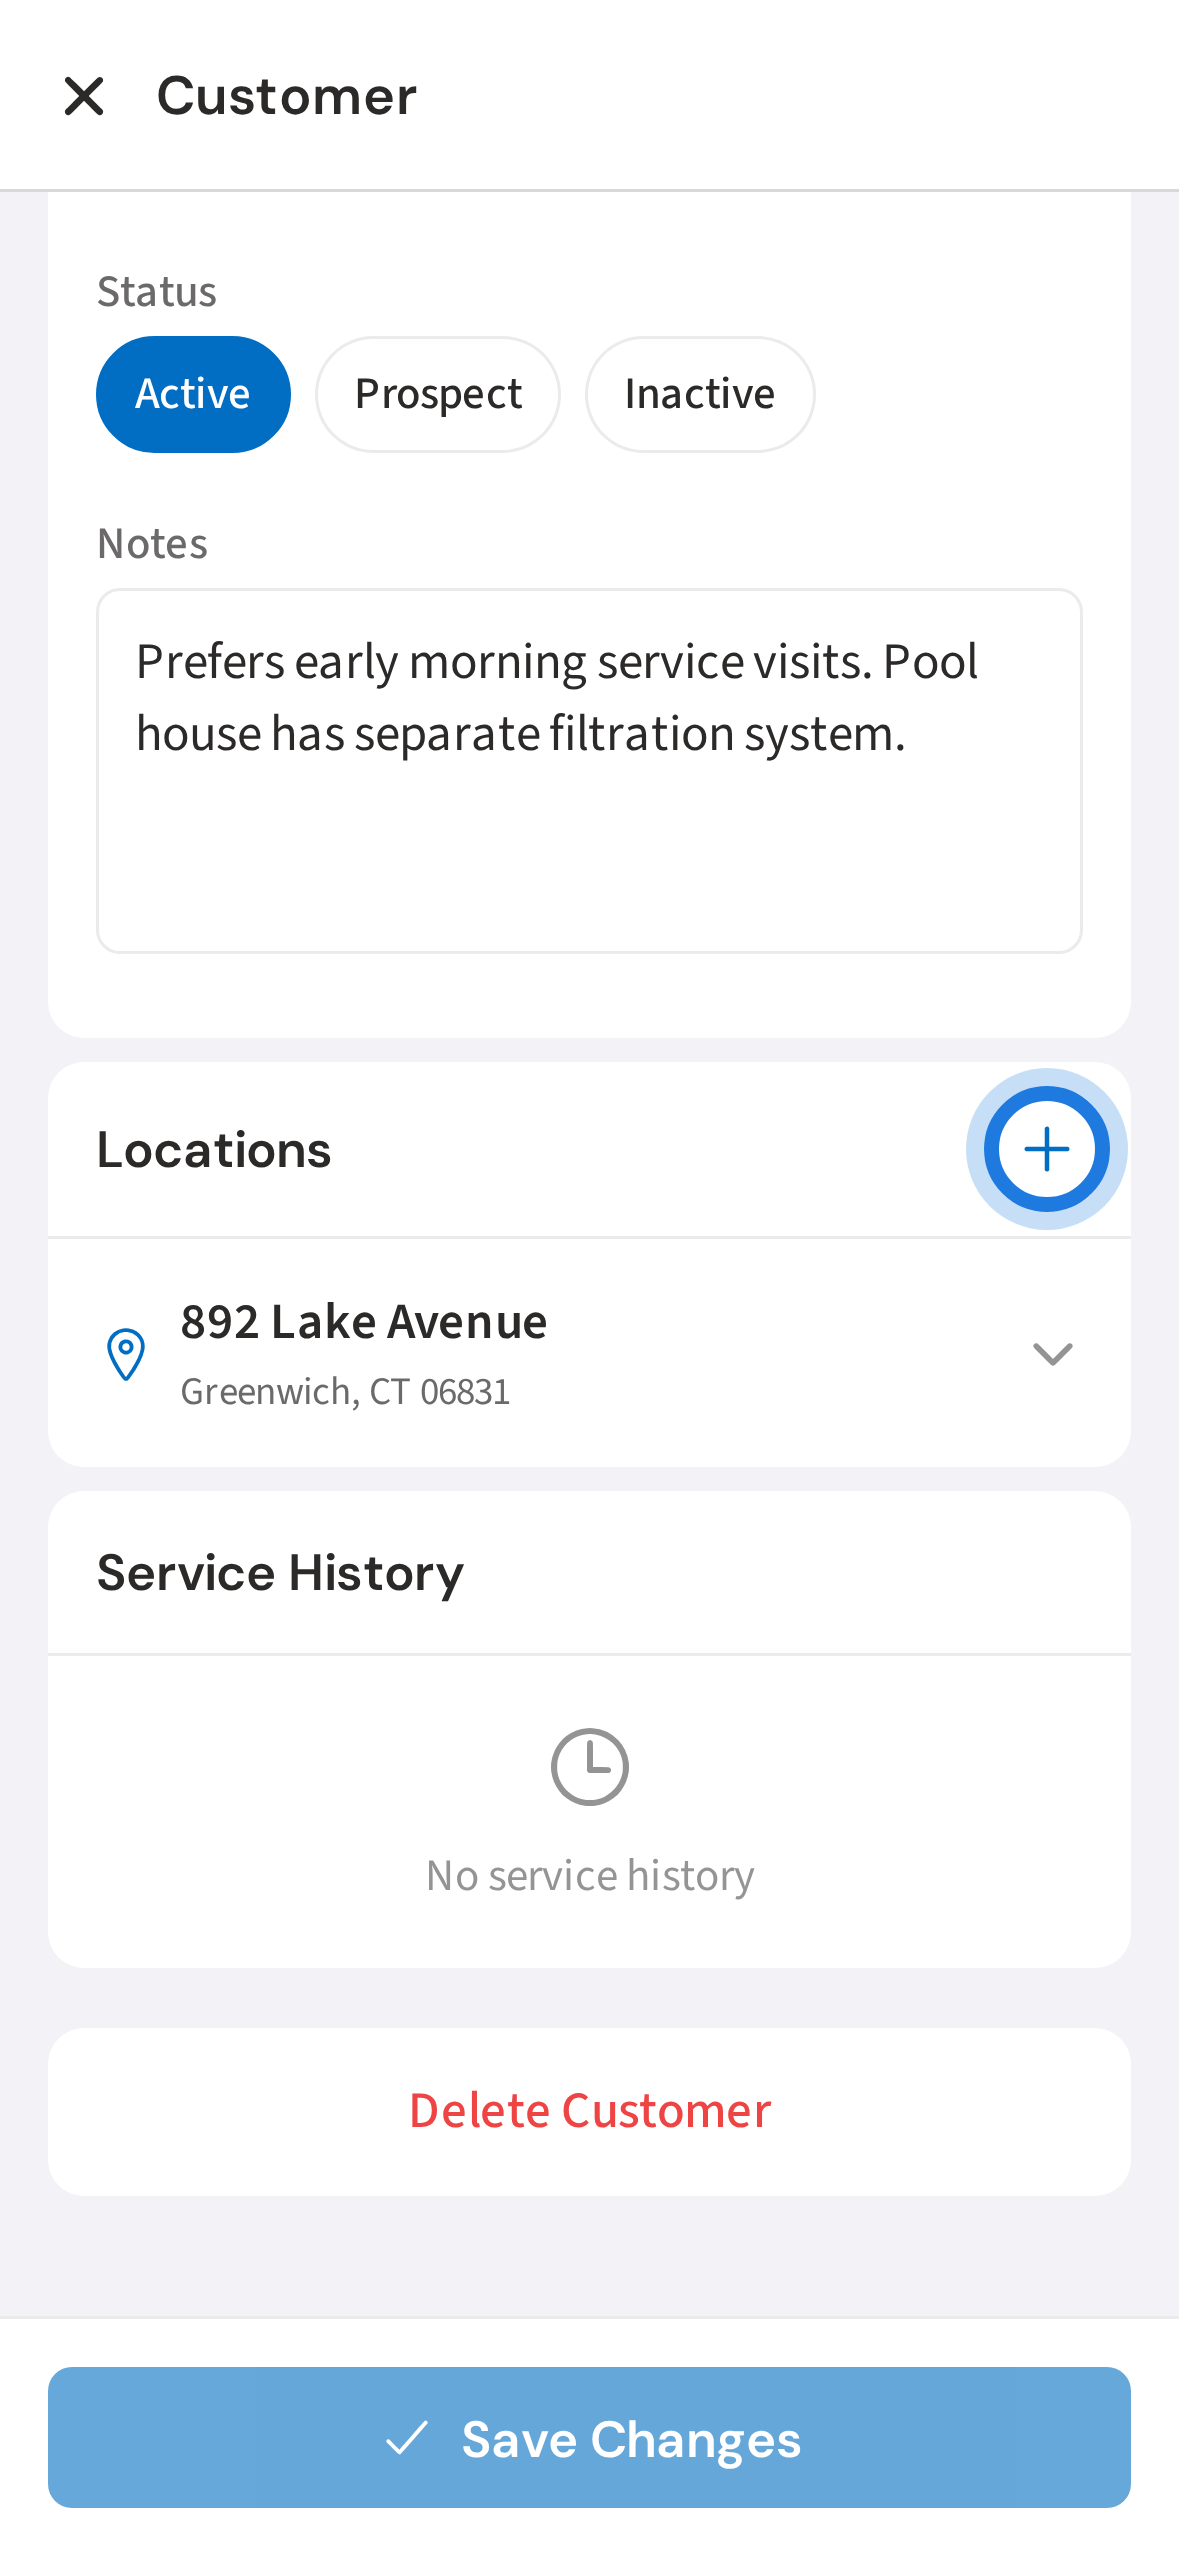
2. Tap + to add a new location
Tap the + icon in the Locations card header to add a new service address. This is the physical location where you do the work.
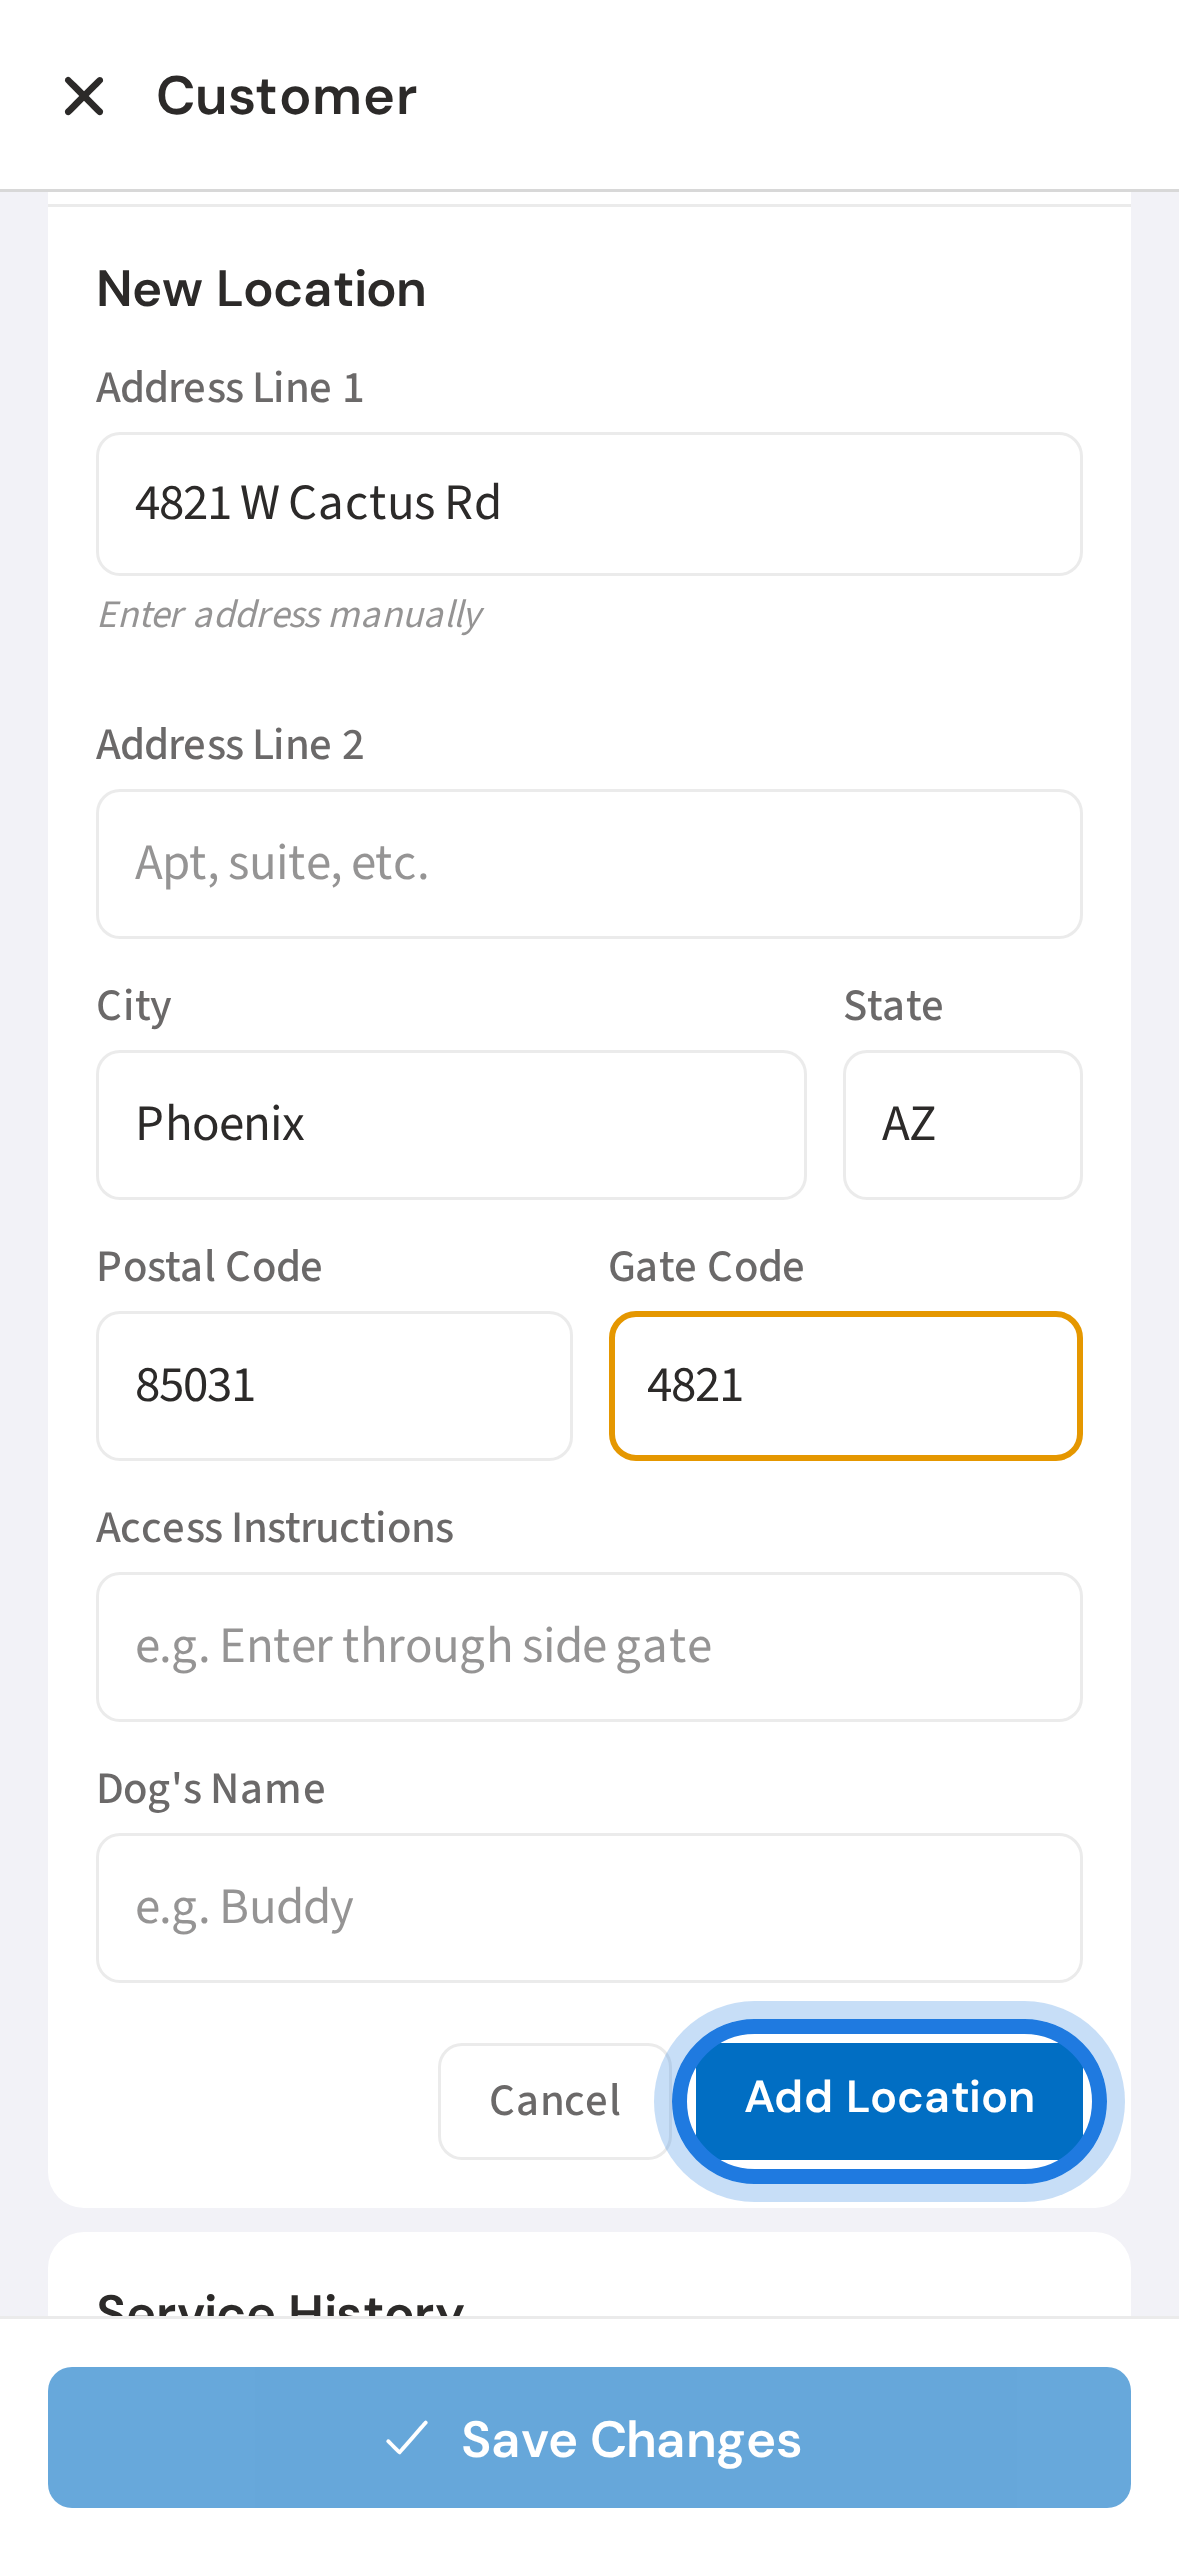
3. Fill in the service address
Enter the service address. Add a gate code and access instructions while you're here — your crew will see these on their stop card.
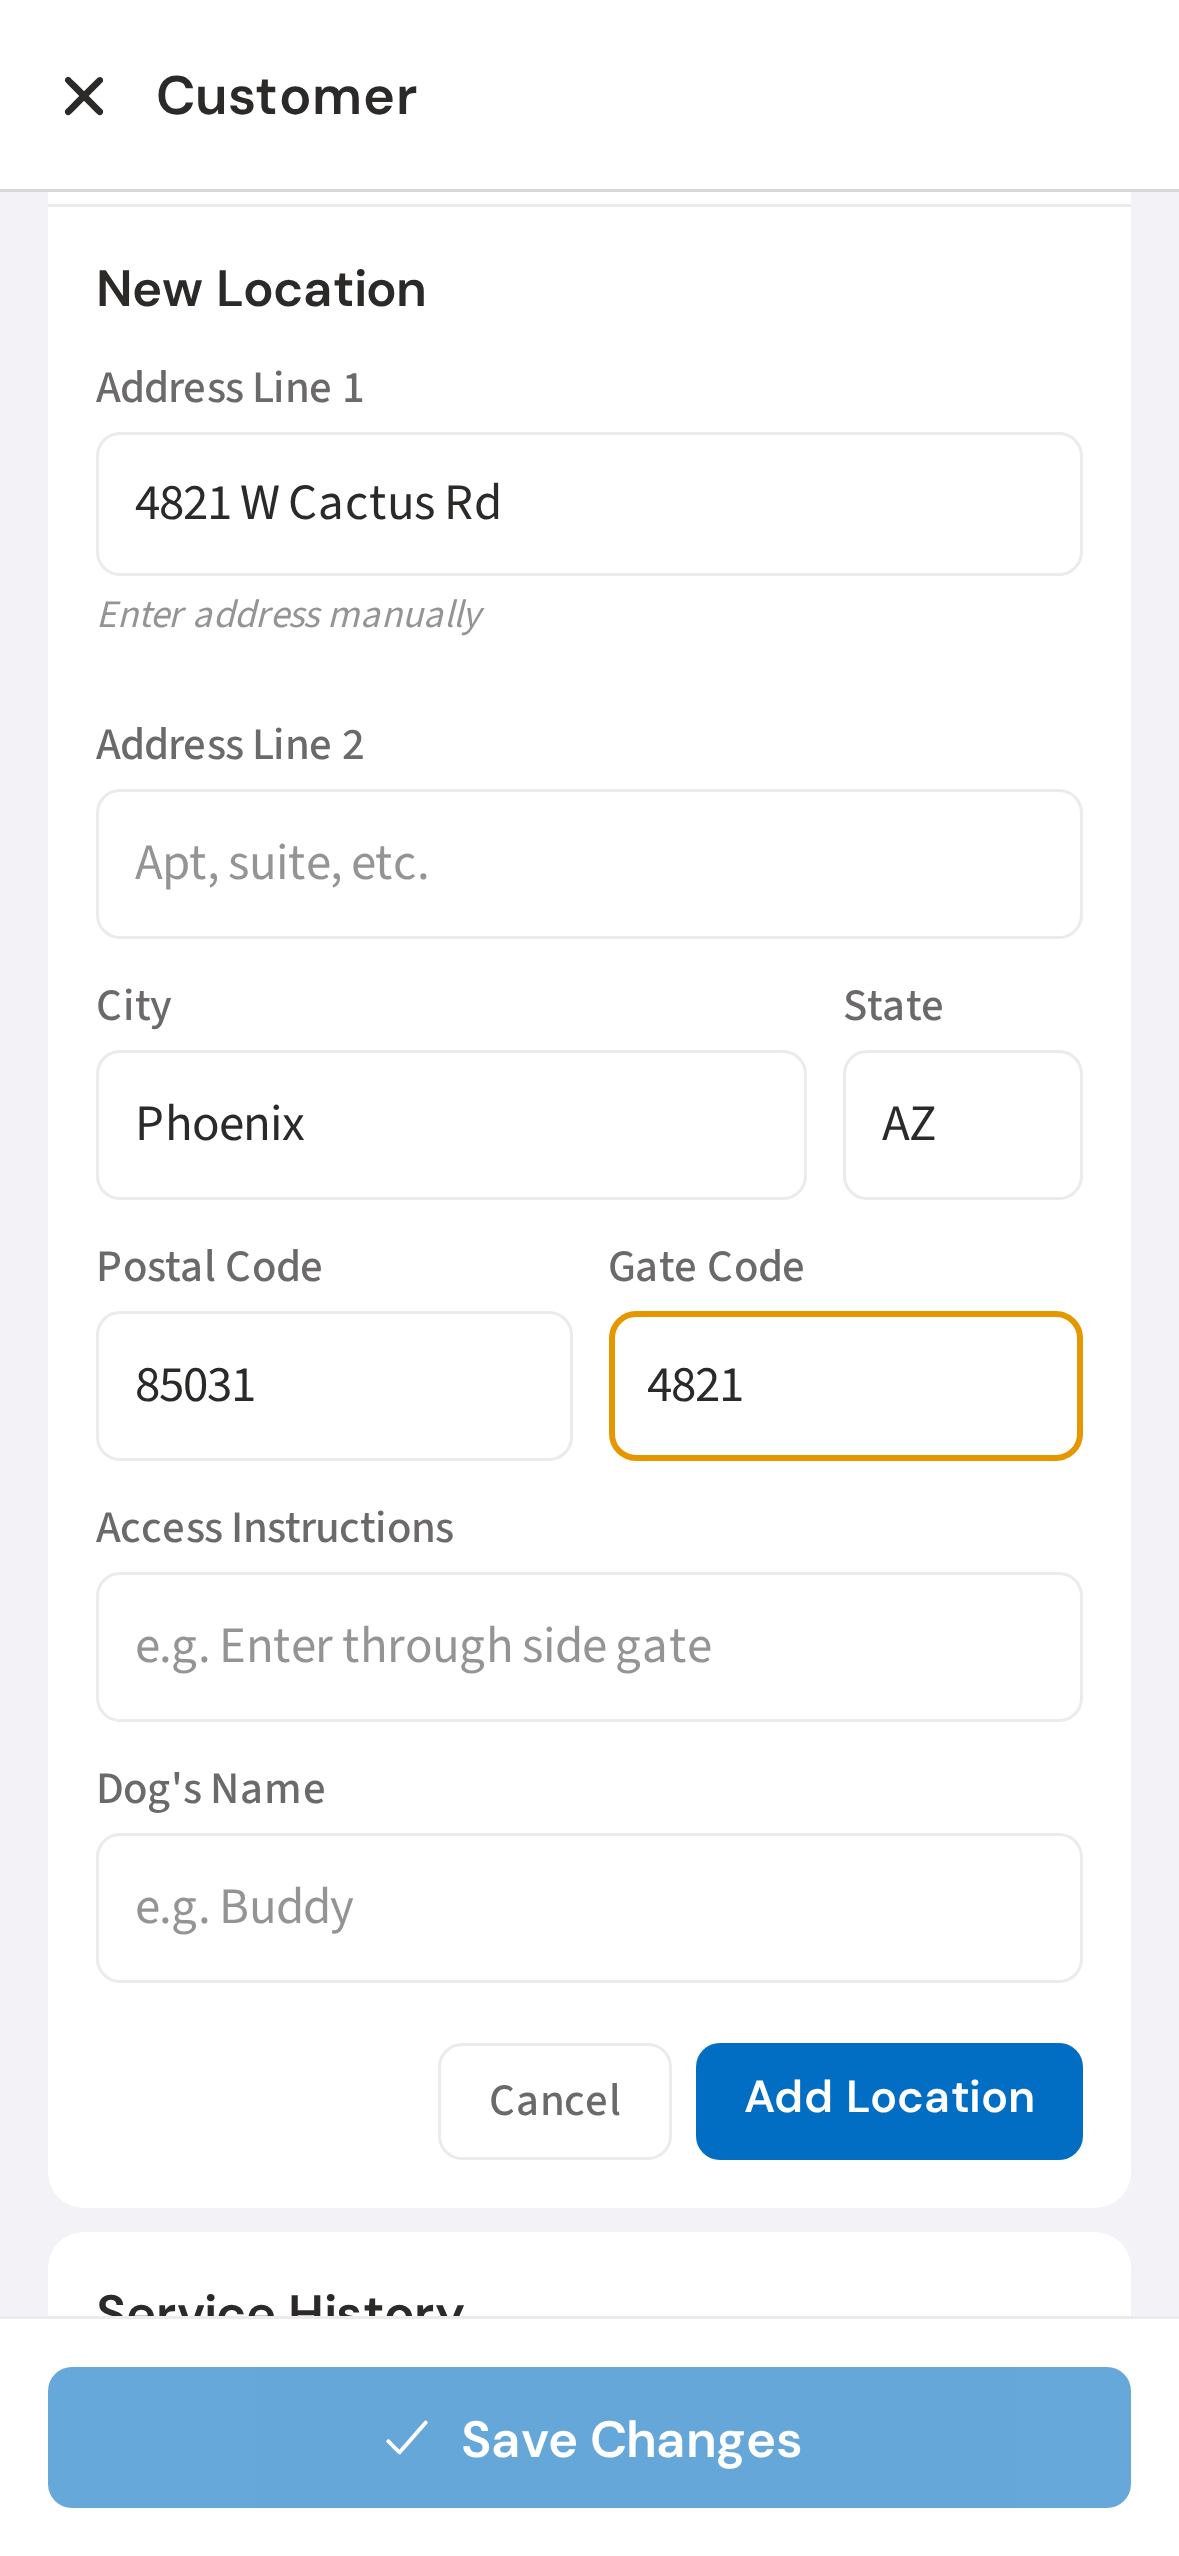
4. Tap Add Location to save
Tap Add Location to save the address. The location will appear in the customer's profile.
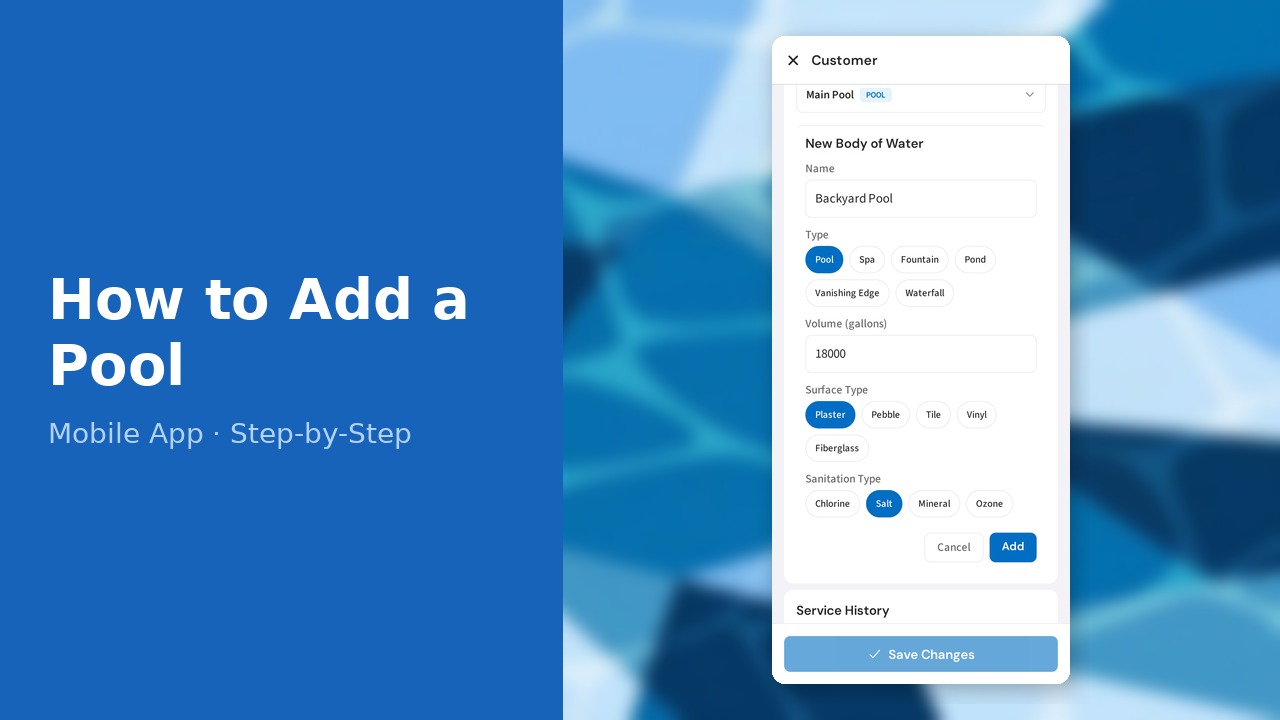
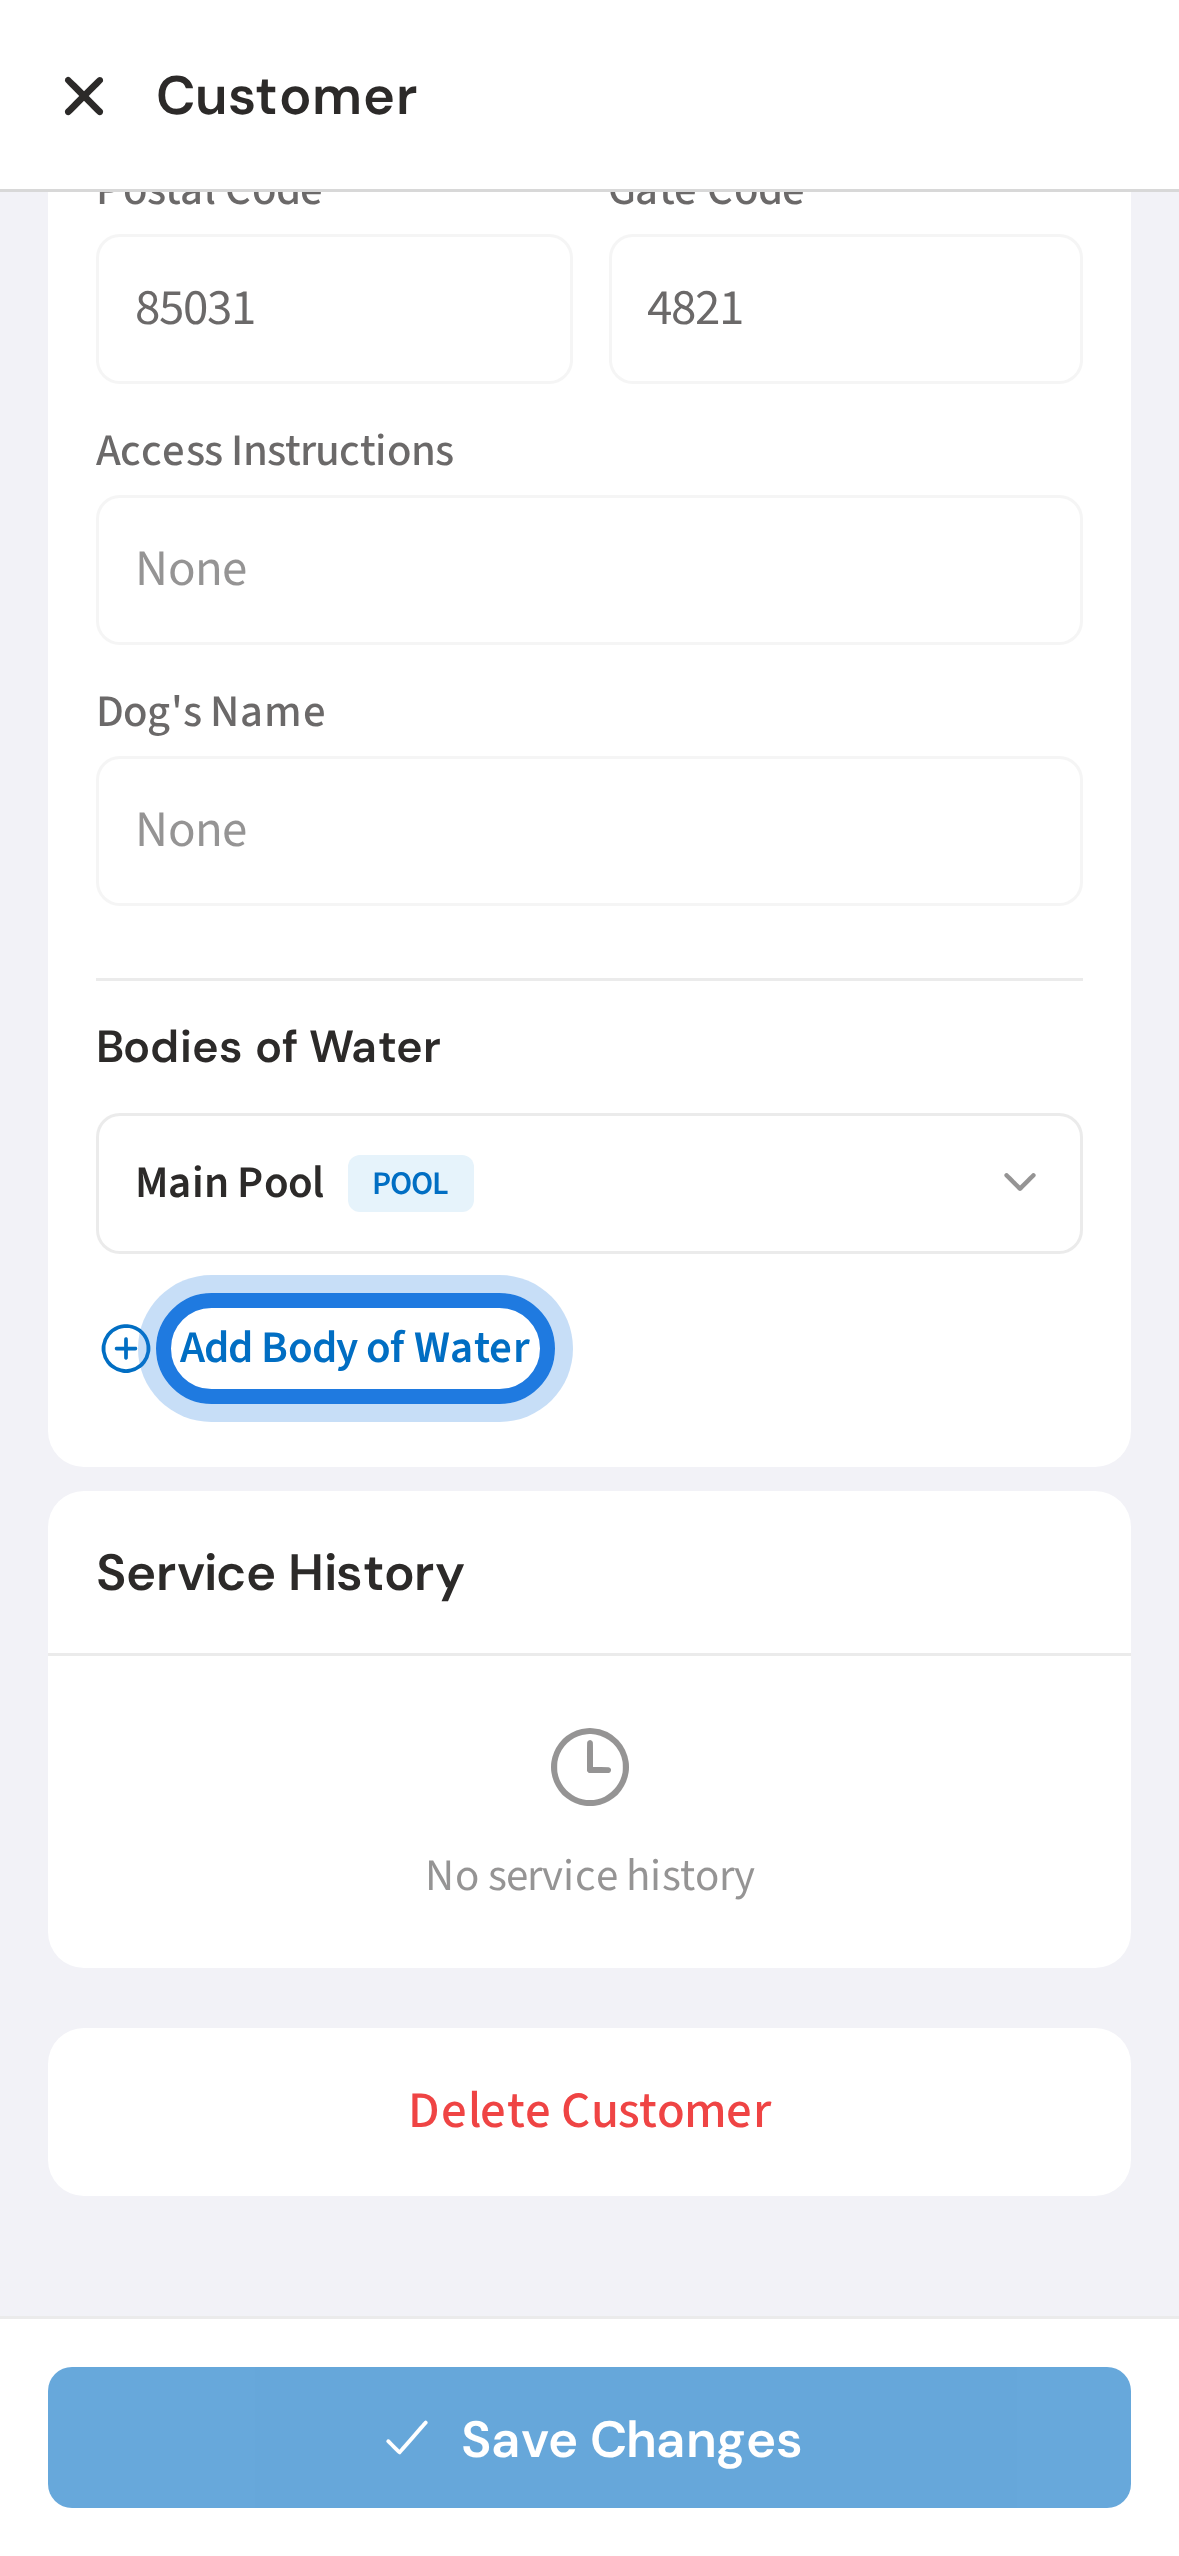
5. Tap Add Body of Water
Tap Add Body of Water under the new location. This is where you record the actual pool details.
6. Enter pool name and select type
Give the pool a name and select the type. Most customers have a single Pool, but you can also add spas, fountains, or other water features.

7. Enter volume, surface, and sanitation type
Enter the volume in gallons and choose the surface and sanitation type. PoolDial uses these for dosing calculations when your tech logs chemicals.
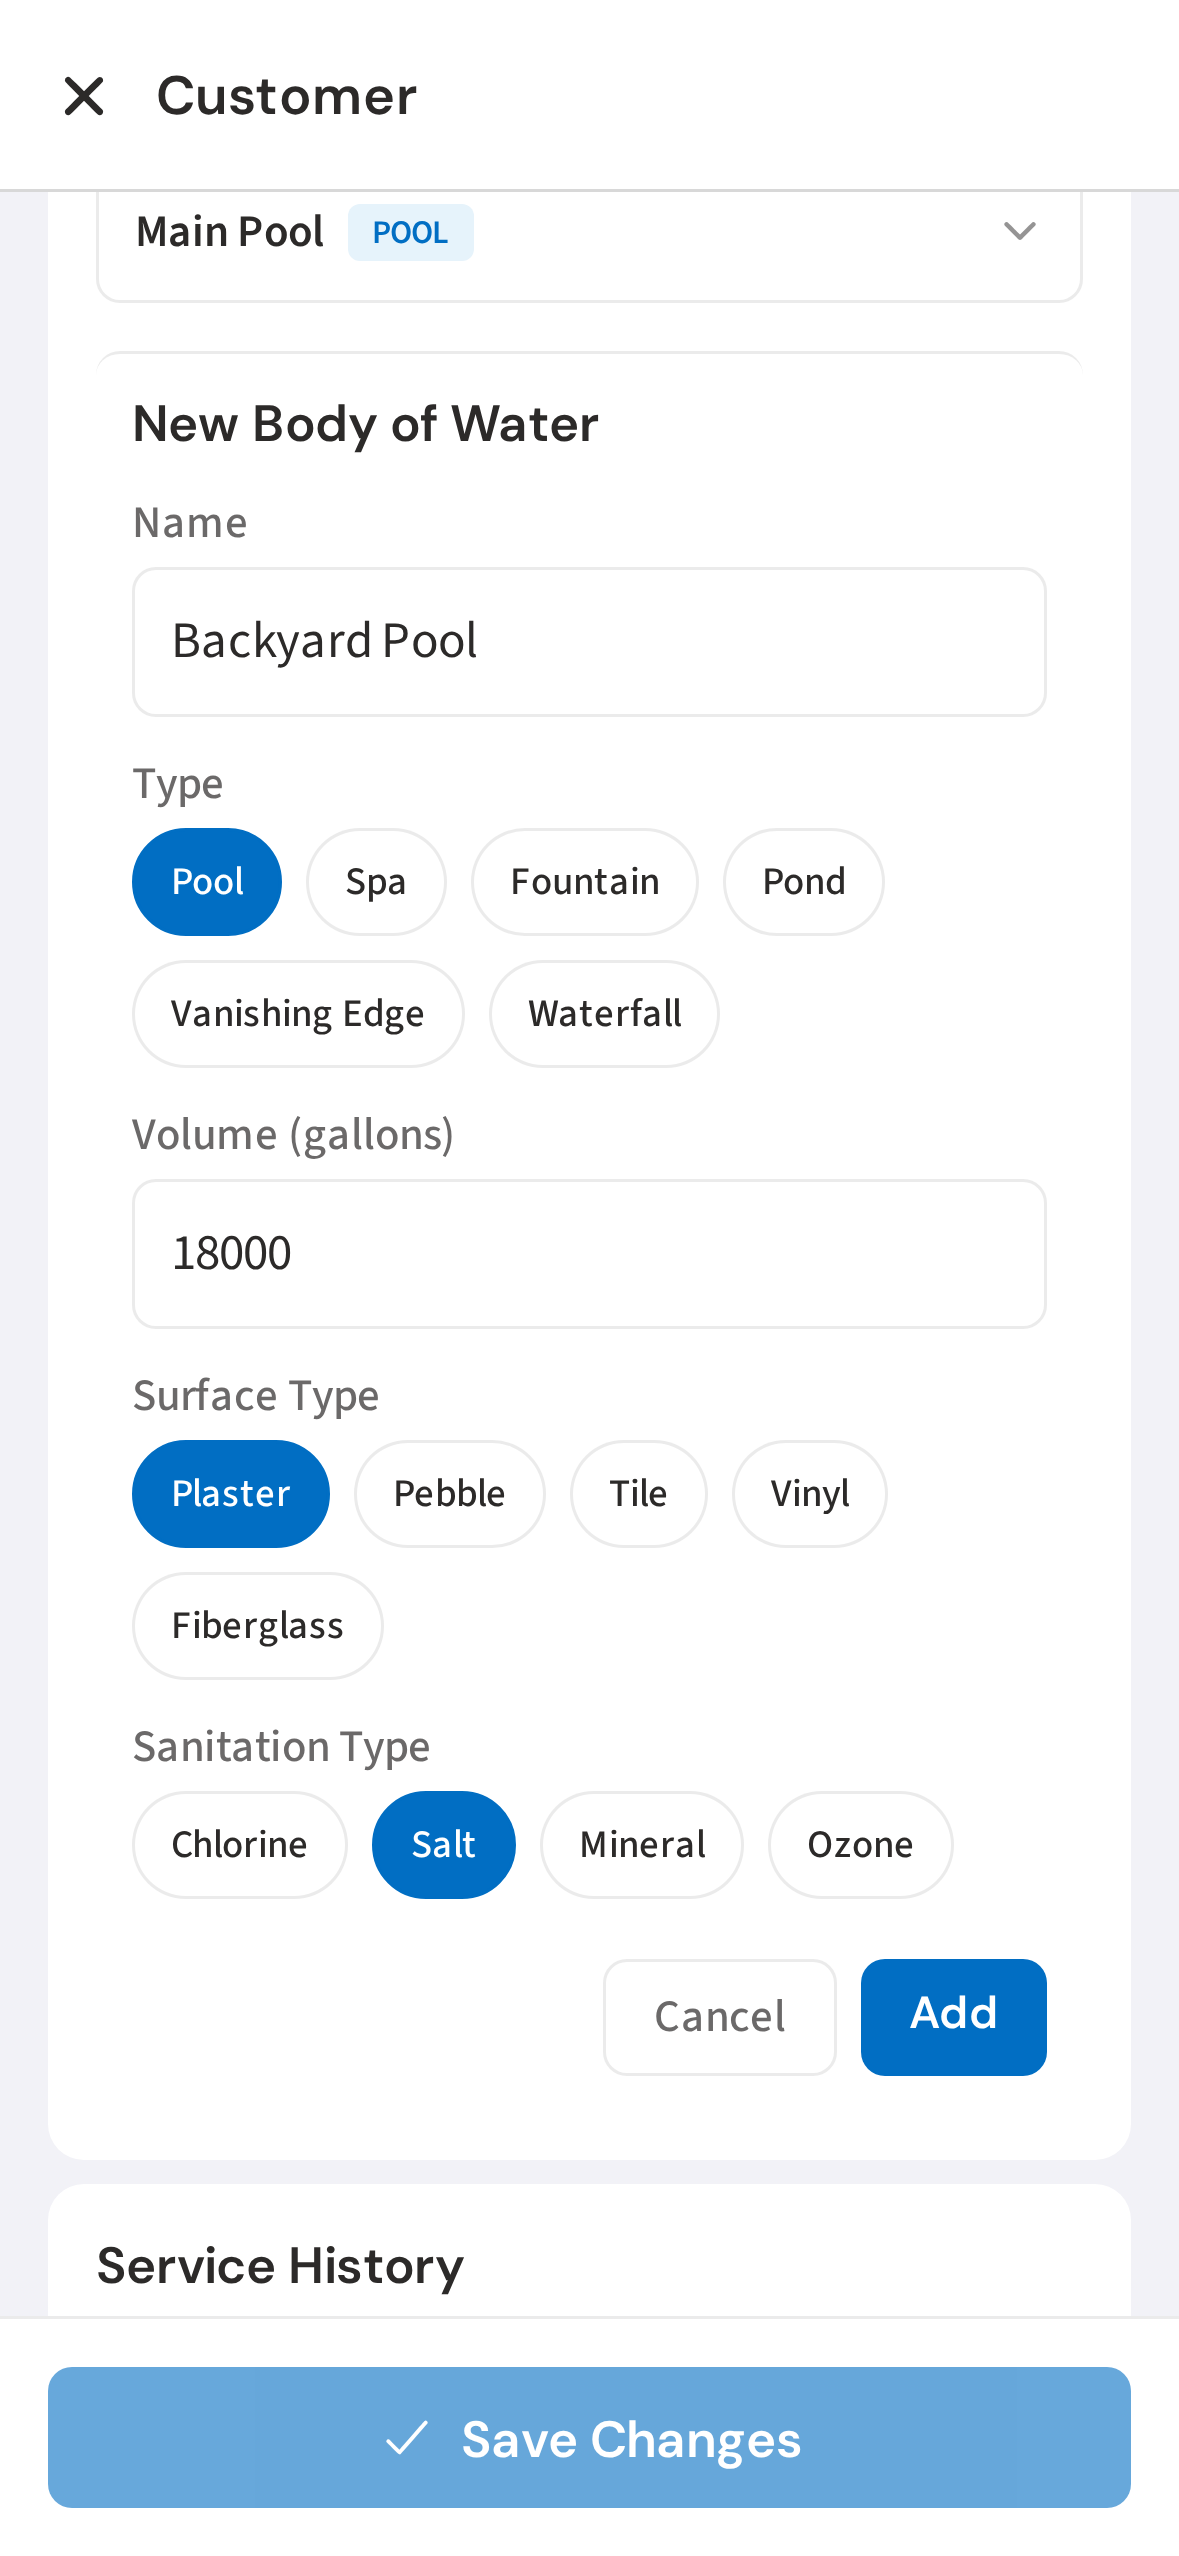
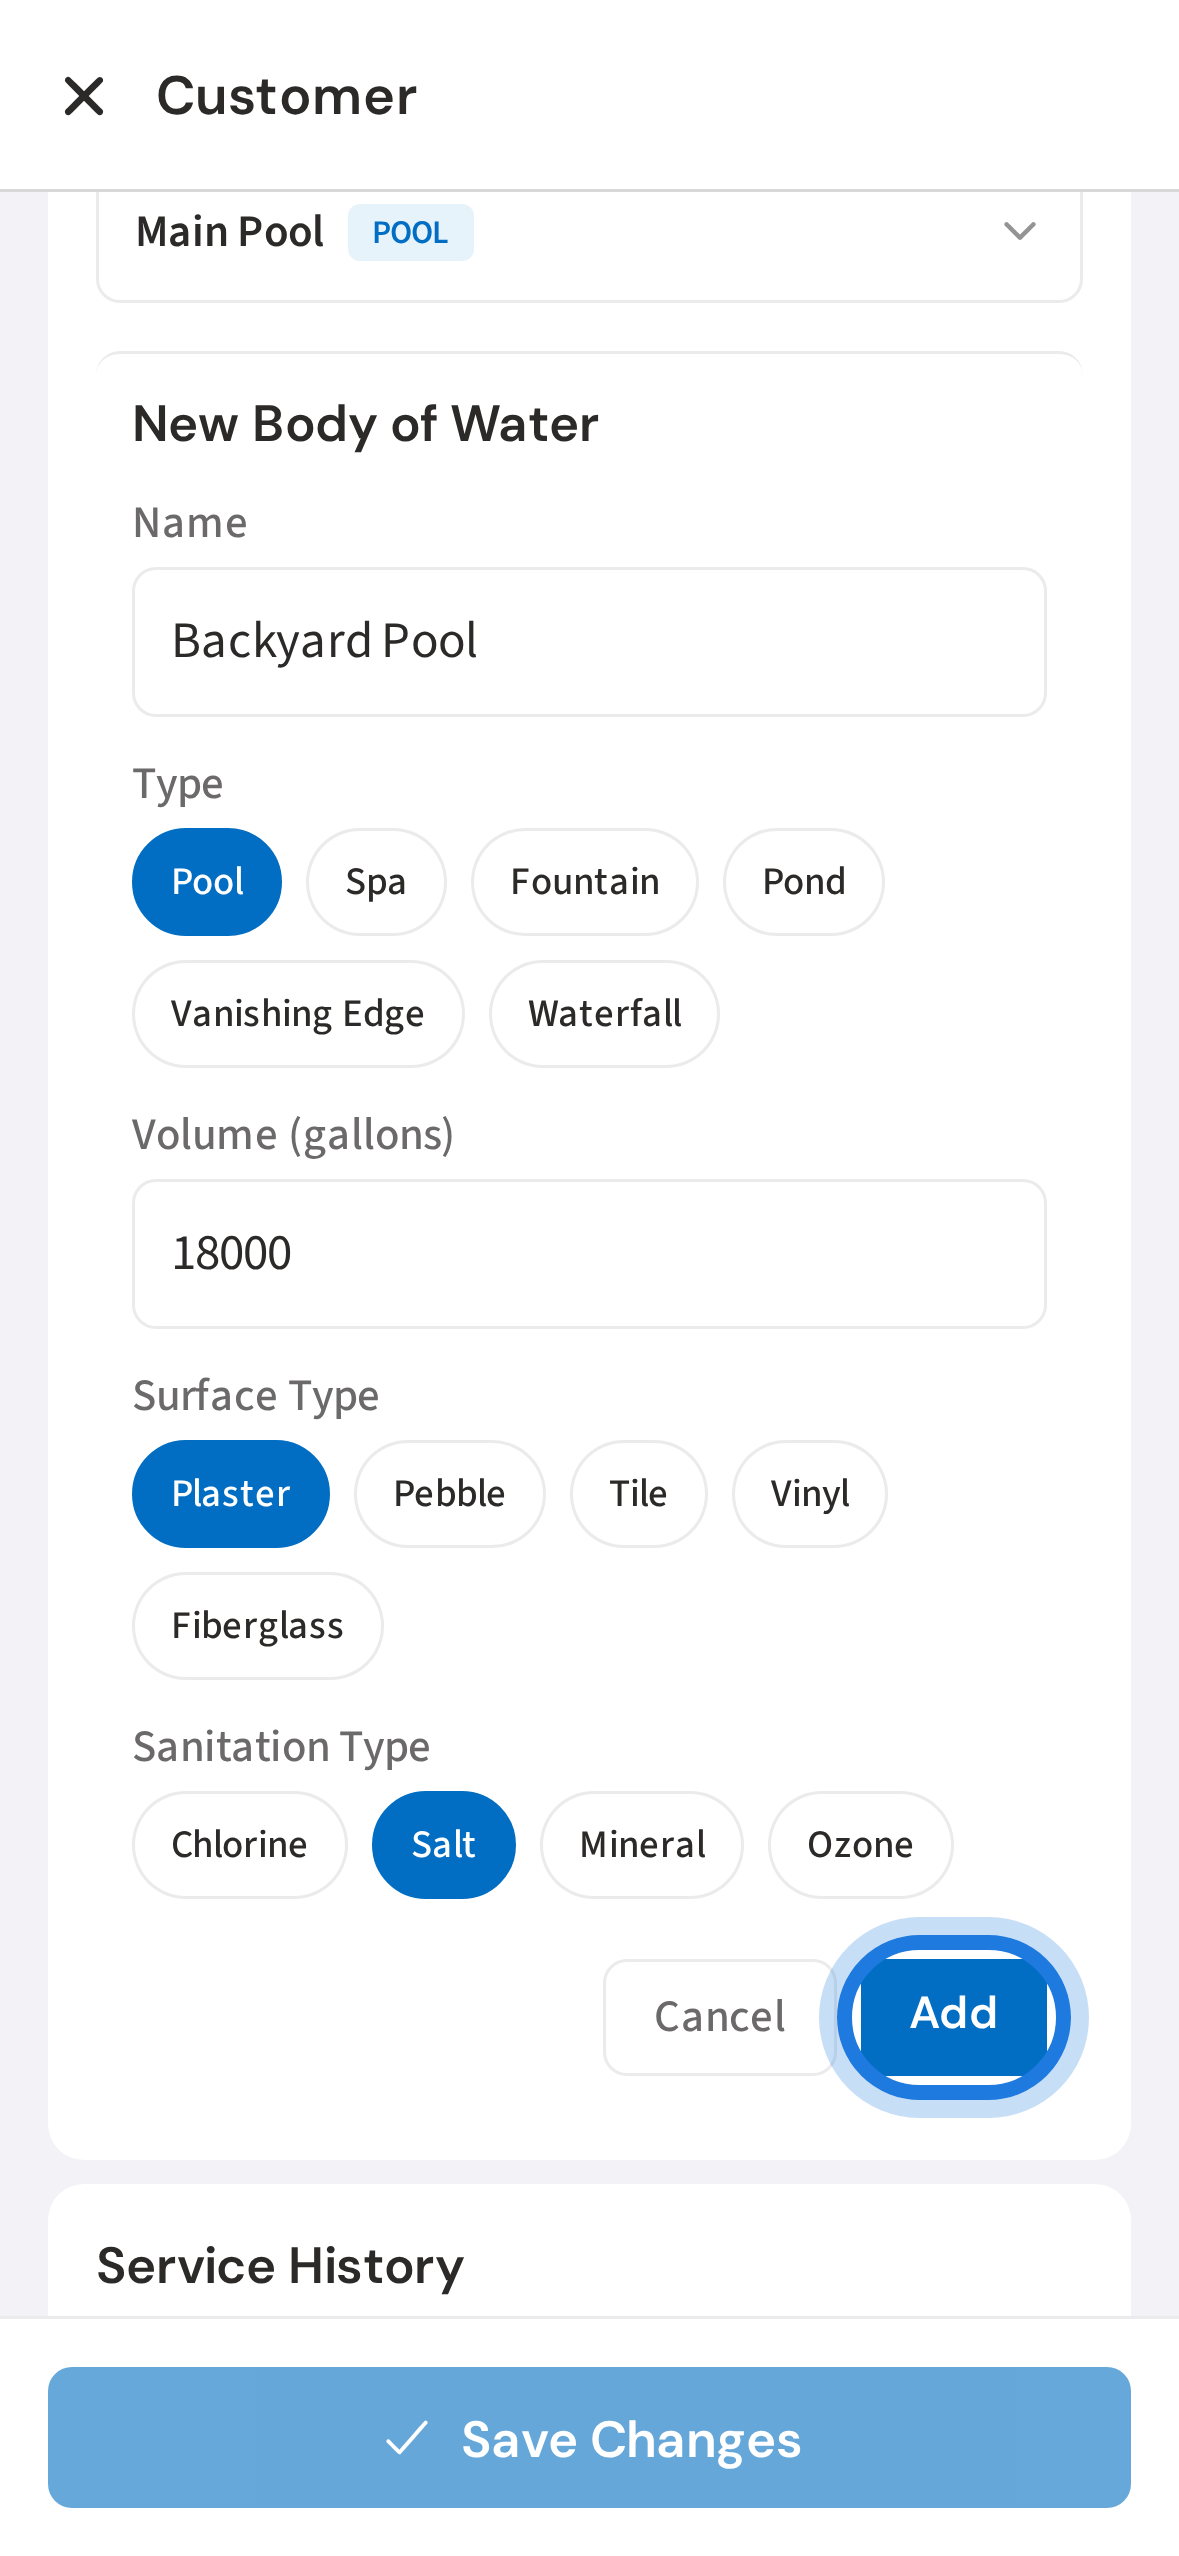
8. Tap Add to save the pool
Tap Add to save the pool. It will appear under the location and is now ready for service logs and chemical tracking.
Not using PoolDial yet?
Manage your customers, routes, billing, and more — all in one place.
Start Free Trial